Lengthen store-bought or handmade knits with this knitting trick!

No matter how hard you measure, repeatedly try on your knits, or promise your first-born sweater in a devil deal... sleeve length rarely plays nice! If you are hand knitting a garment, there are two ways to invisibly lengthen sleeves:
- Top-down? You lucky knitter, just unravel your bind-off and keep knitting. *
- Bottom-up? Unravel the cast-on, catch the live loops on a needle and knit downward. **
Today's story won't be about invisibly lengthening your hand knits. Today's story will be about a very visible knitting hack that you can use for those annoying asterisk situations or even your store-bought knits.
I introduce you to the versatile Double Cuff! (and her twin sister not covered here, the Double Hem)
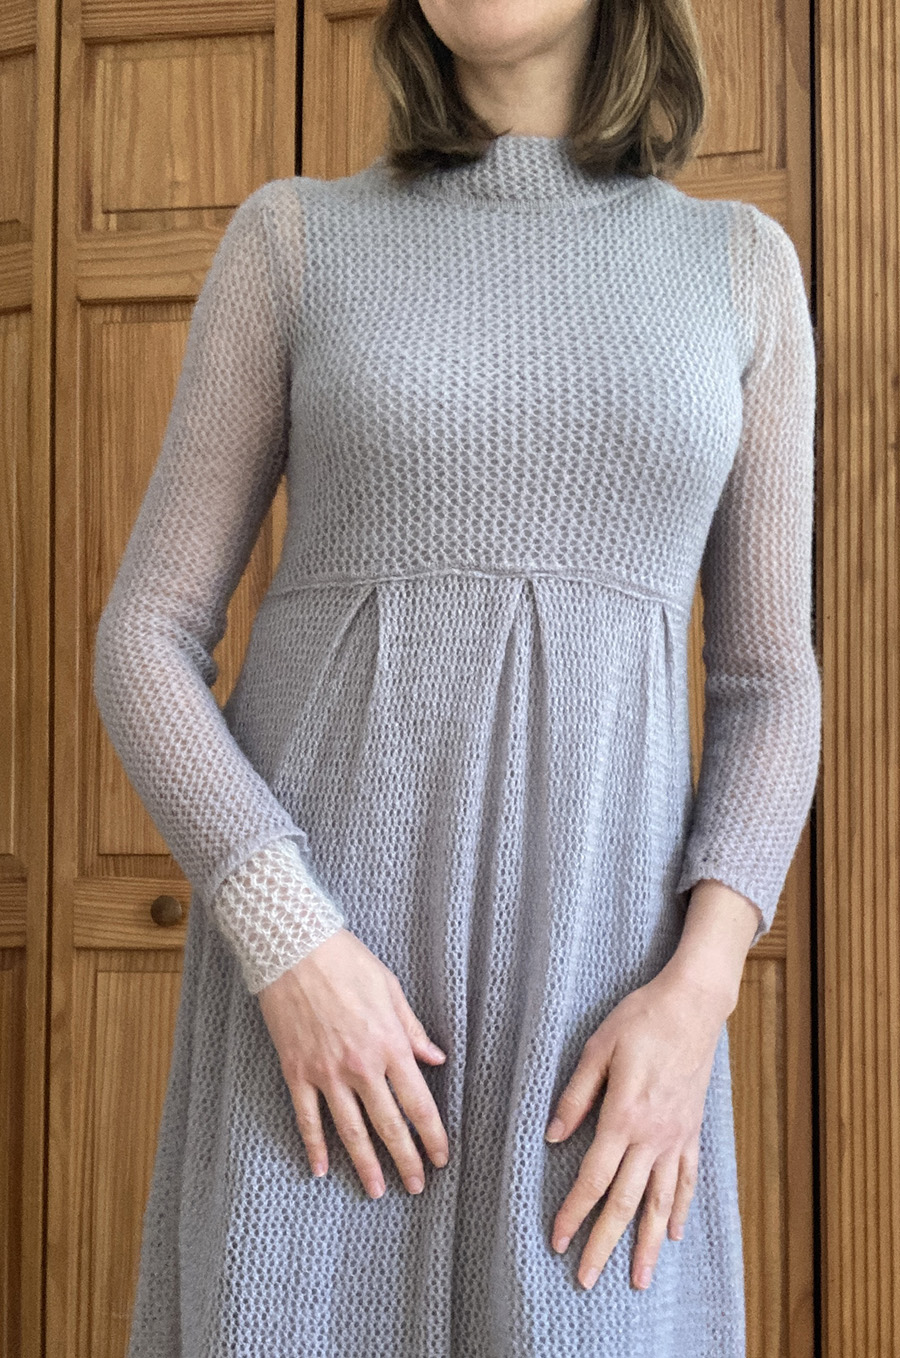
I found this cute knit dress in a thrift shop in Pasadena, CA for $12. I don't tend to buy knits because people always ask me, "Did you make it?" Then I have to get cheeky and answer something like, "Nooooo, but I could." The exception is a knit like this one: very tiny gauge, taking a millennium to make, and in a stitch pattern I wouldn't bother with:
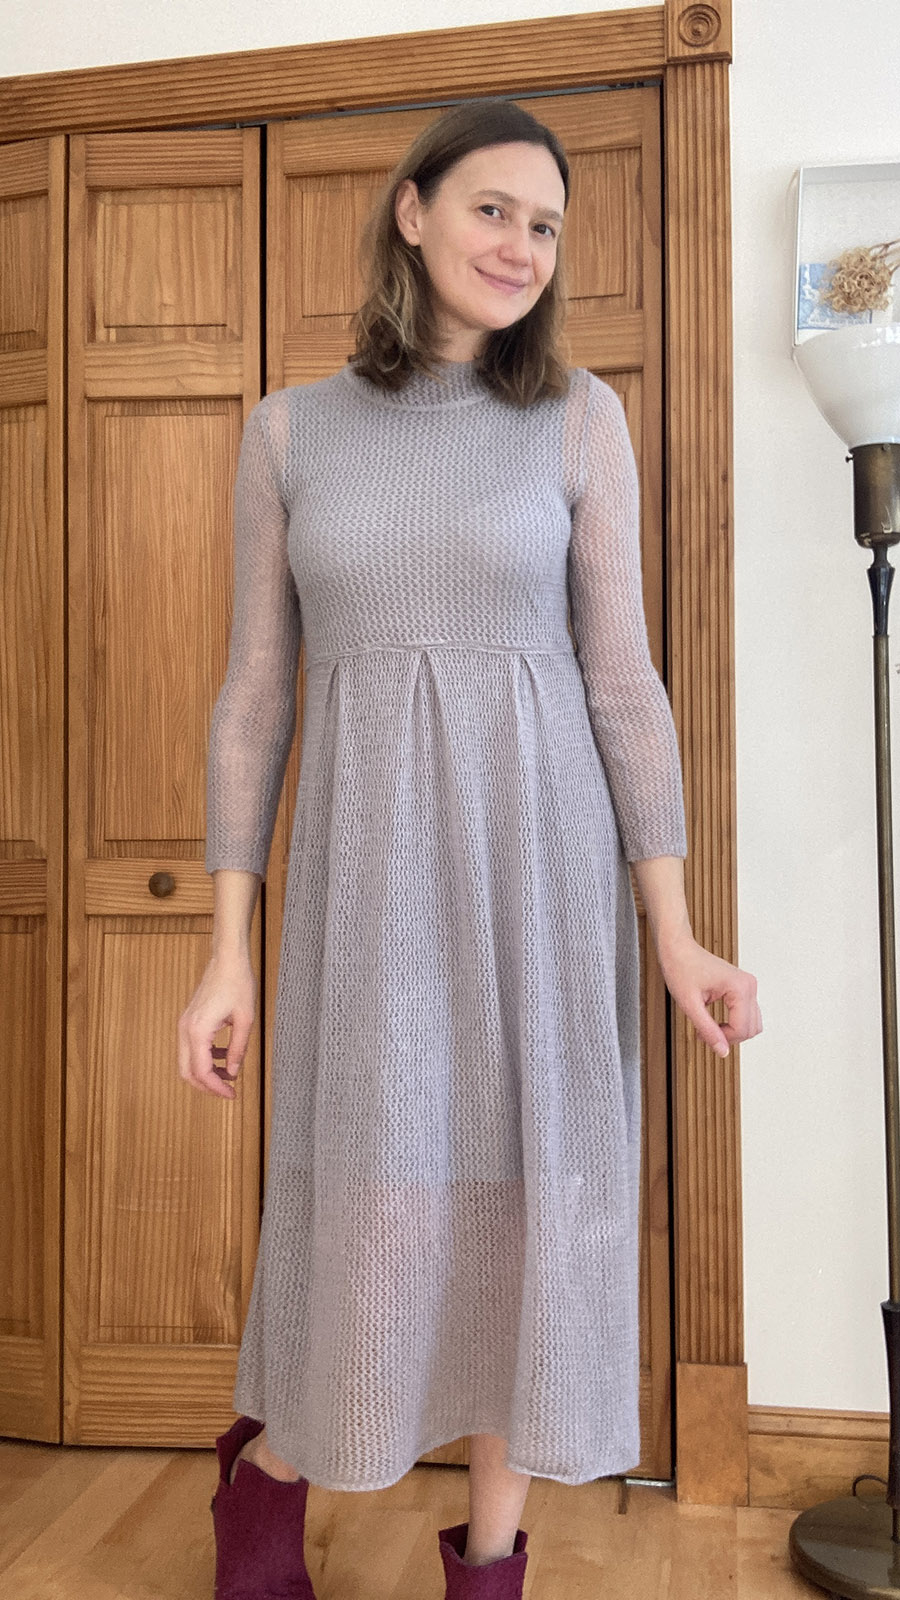
I was definitely going to buy it, but I wanted to lengthen the sleeves. How? One way would be to catch live loops above the ribbing, cut the ribbing off and then try to knit new, longer ribbing downward. People -- don't do this with machine knits in small gauges! You and the knit will part on very unfriendly terms.
I thought back to a baby sweater cardigan from Bergere de France that I had wanted to replicate for adults:

I thought, why don't I create a double cuff for this dress, starting from under the original cuff?
Double Cuff Instructions
Step 1: Choose the yarn
This is extremely forgiving. You can try to match the color and weight of the yarn used in the garment, but that can be challenging, especially if the knit has a very fine gauge. Don't be afraid to choose something completely different, keeping in mind that a different fiber type and weight will change the drape a bit.

I'll admit to having a ridiculous, lifespan exceeding stash, but even I did not have a lace weight mohair-style yarn that exactly matched my dress! Instead, I picked a similar fiber alternative in a sea green shade that would introduce a nice tonal change to the lavender.
Step 2: Choose the stitch pattern
This is also quite forgiving. Once again, you can match the exact stitch pattern, but that will be especially hard for fine gauges. Alternatively, consider knitting something completely different! Stockinette, moss, ribbing, lace? It really can be whatever you please.
As an experienced knitter, I could tell that the original dress stitch pattern was a simple lace mesh of "k2tog, yo, repeat" so I thought I'd try to continue that pattern in my double cuff. If that had failed, I would have used stockinette.
Step 3: Choose your gauge / fabric style
This will rely on what yarn and stitch pattern you've chosen for your double cuff. You can use the needle size recommended for the yarn, or you can change the drape of the double cuff by choosing smaller (firmer) or larger (floatier) needles.
For my dress, I wanted a lacy effect (that wouldn't take too long to knit, frankly), so I decided to use a larger needle than specified for the yarn.
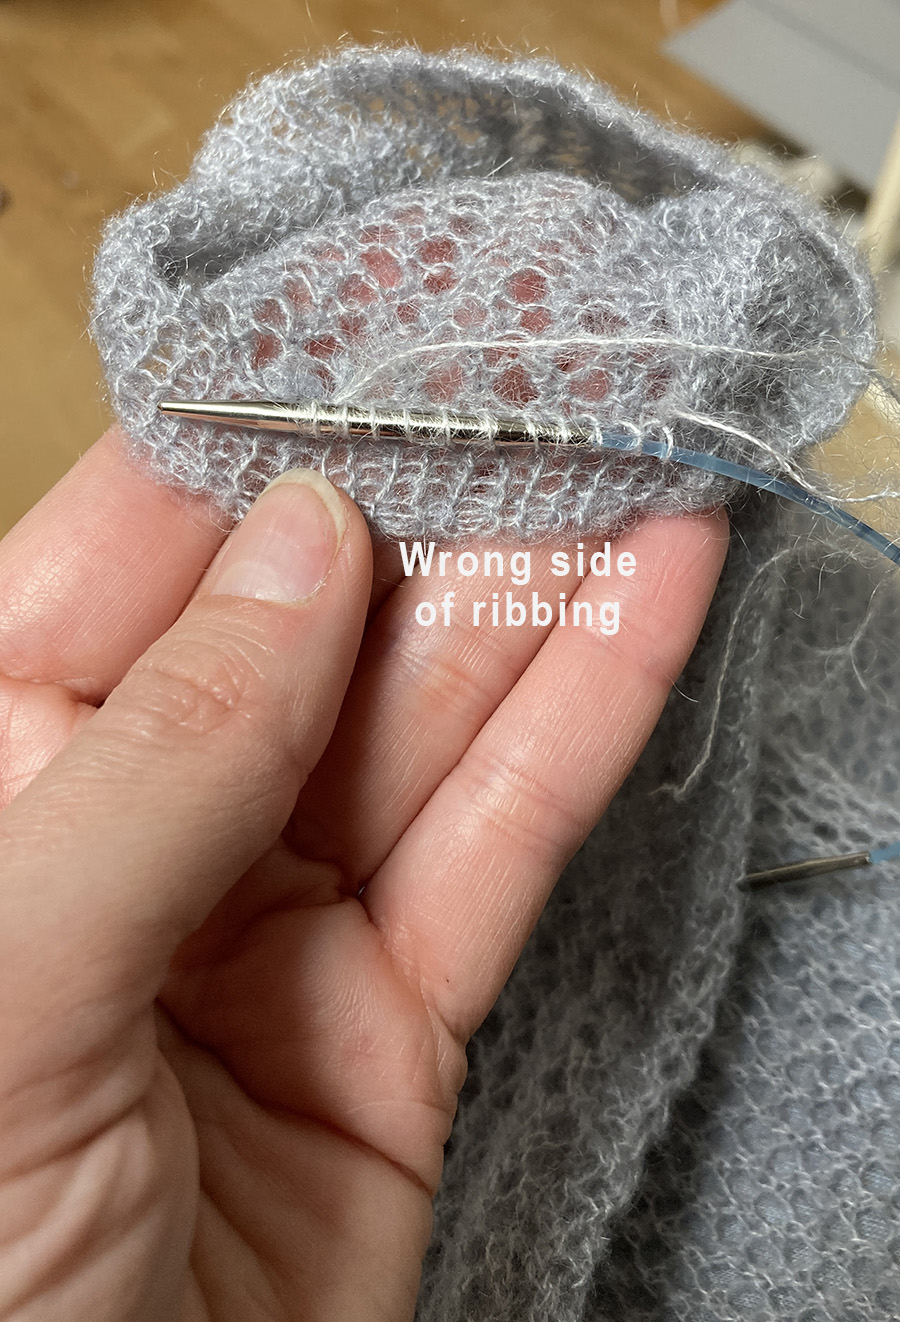
Step 4: Pick up stitches from the original cuff underside
The goal is to pick up stitches from under the cuff so that you can knit "top-down" towards the wrist. With the right side of the sleeve facing, fold the whole cuff (or part of the cuff) towards you to reveal the wrong side of the cuff. You will be picking up stitches through the purl bumps around the cuff, moving left, onto a short (8in or 12in) circular needle for knitting in the round, or a long circular / two circulars for magic loop knitting in the round.
If you are using the needle recommended for the yarn you chose, you can probably get away with simply calculating how many stitches you need to pick up. Otherwise, knit a swatch in your yarn and stitch pattern to calculate. For example, if your gauge is 5 sts/ inch and you want an 8 inch cuff, pick up 40 stitches.
I knit a small swatch with my needles and decided I needed 32 stitches for my cuff. I realized there was an added bonus to this technique. I didn't need to perfectly distribute the stitches or even pick them up in a straight line because no one would ever see this part of the cuff!
Step 5: Knit
This part is easy, just knit until you're satisfied. However, if you have a very long double cuff, or if you'd like a form-fitting fit, feel free to throw a few decreases in there to slim the cuff at the wrist.
The original sleeve was quite tight so I made sure my double cuff followed suit by decreasing every now and then, trying it on occasionally to see if I needed even fewer stitches.
Step 6: Choose finishing and bind-off
You do have to think about how to finish the end of the cuff. If you don't mind a rolling hem for a stockinette or lace pattern, simply loosely bind-off after you've knit enough length to account for the roll. If you'd like to avoid the roll, consider switching to ribbing, garter or moss stitch for the last inch or so. As before, bind off loosely.

My stitch pattern did not alternate knits and purls, meaning that it would roll without an alternative finish. I switched to a 1x1 rib identical to the original cuff to mirror the effect and keep it flat at my wrist.
I loved this result and am now thinking of all the many tops I've bought that I'd like to add a double-cuff to. Honestly, why limit this trick to knits? You could always knit a cuff separately (or even repurpose a swatch) and simply sew it on to any fabric cuff underside that needs lengthening. I see endless possibilities!
Dayana Knits


FANTASTIC read! Thanks for sharing.
ReplyDeleteWonderful, I'm glad you liked it!
DeleteThat’s a beautiful dress, but you made it even more lovely with your delicate cuffs. Thanks for the info. 🥰
DeleteEspecially when sweaters or t-shirts aren’t the right length, techniques like these are really useful! It’s also so satisfying to personalize and adjust the length of a piece you’ve knitted yourself.
ReplyDeleteJust the idea I needed. Thank you. So pretty.
ReplyDeleteOh, I'm glad!!
Delete