Turning A Corner -- Rowan Mystery Afghan KAL Finishing Tips


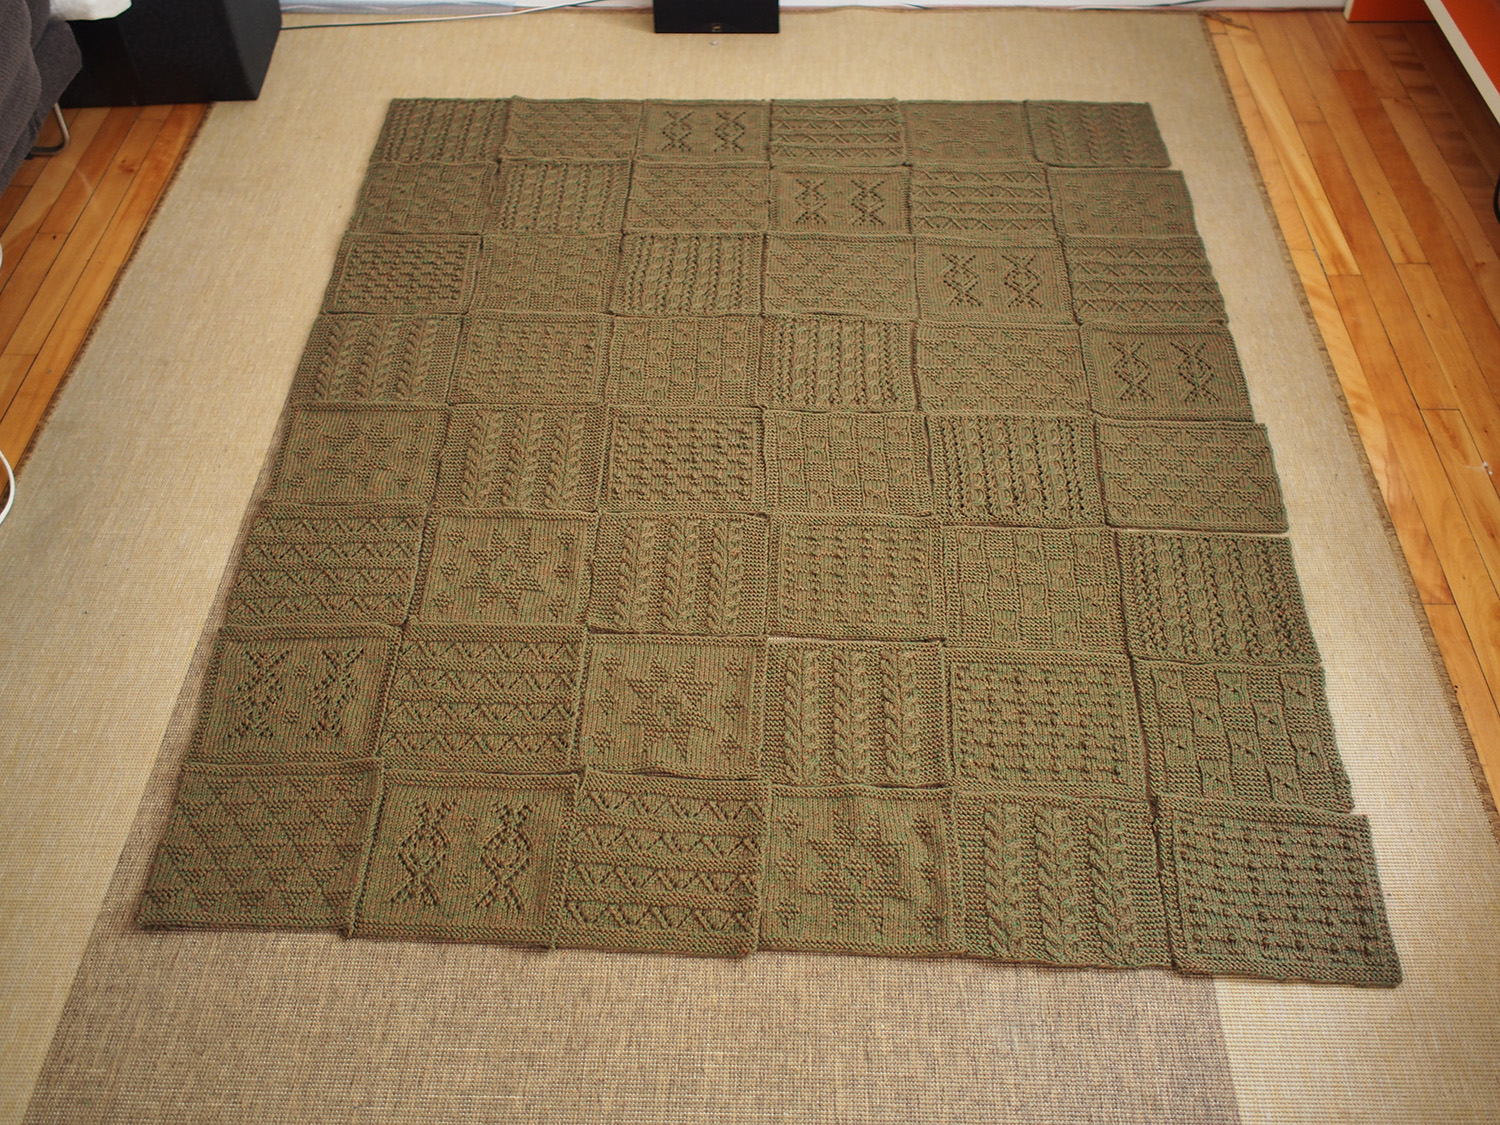
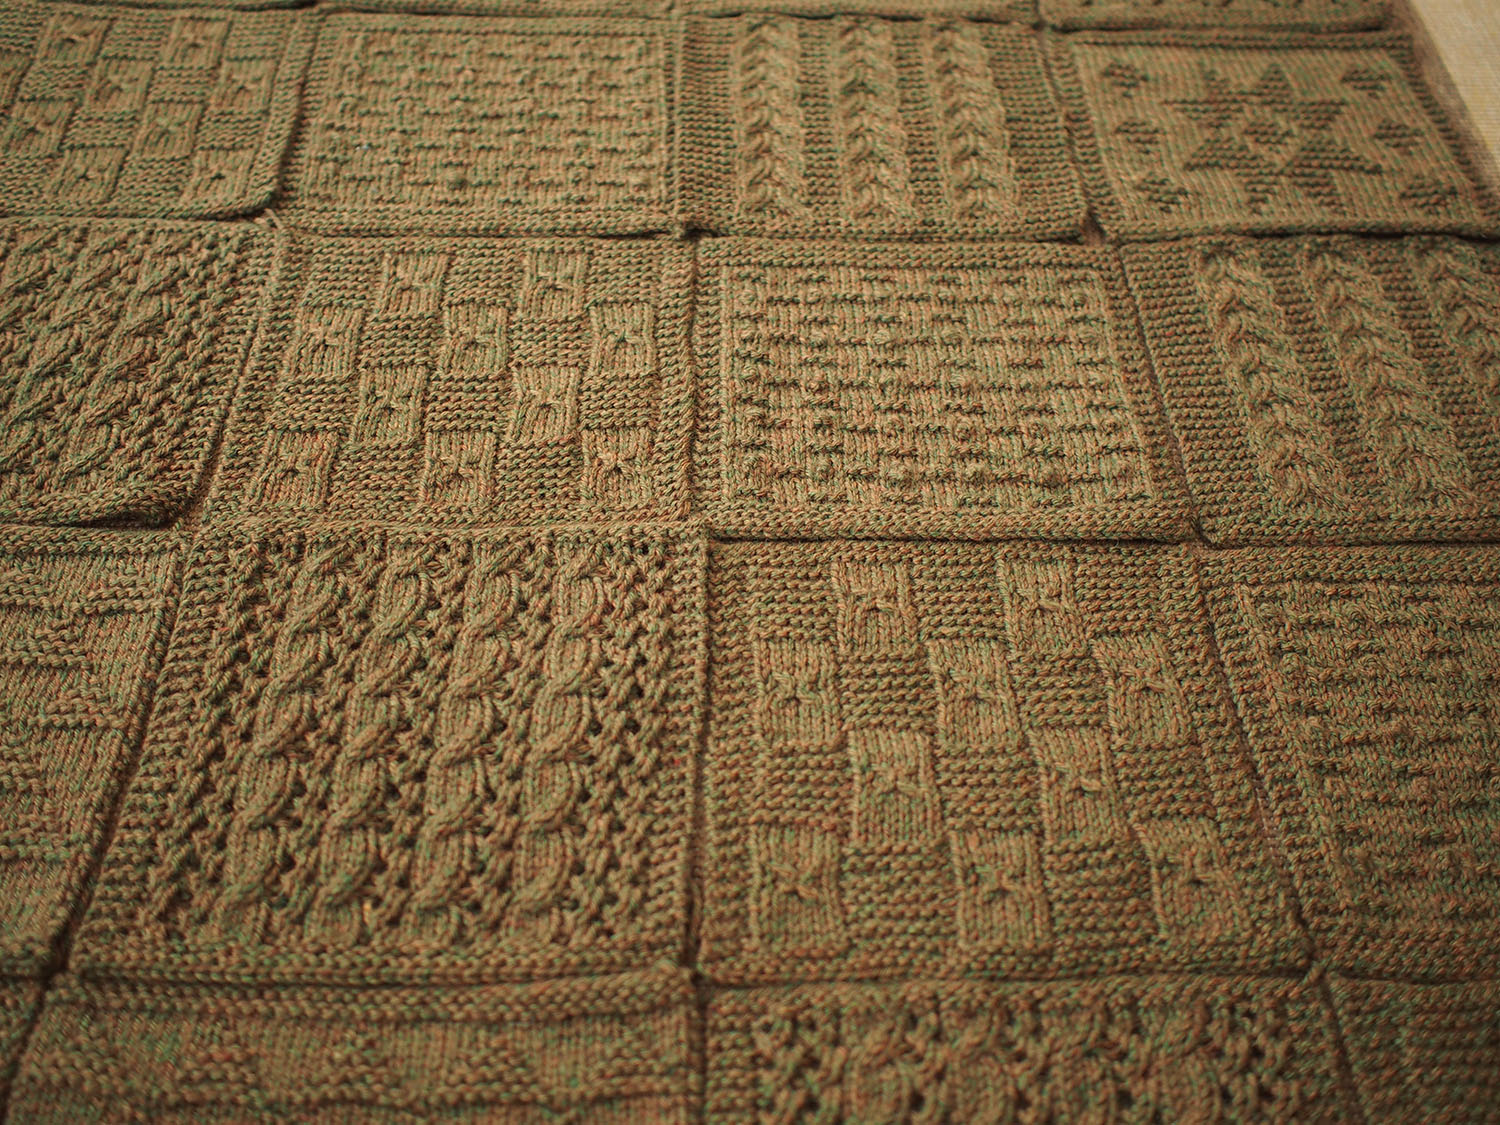
It is Week 9 of 10 of the Rowan Mystery Afghan KAL and man, what a lot of knitting it's been! I'm rather proud to be on track. The 48 squares are finished (wowzers) and now I am knitting the marathon-length trim. Oddly, we are still in the dark about how all the squares go together. I wish that info had come before the trim, because the trim clue photo ends up being out-of context with how the afghan will look as a whole.
 |
| Download all the KAL patterns free, here. |
First, the trim is not attached in this photo, making it look pretty poofy. It has been compared to a pizza crust, omg! Secondly, it's too zoomed in... the afghan is way bigger, but from this picture it looks like the trim will overwhelm it. No, it won't! If you'll put your trust me, I've seen a couple of finished afghan photos and it's really worth a try -- this trim is quite small and thin compared to the entire piece.
In this post I give 4 afghan finishing tips, so go ahead and fast-forward to what you may be interested in:
- An easy way to count your rows for the original cable trim.
- A mod for a wider cable trim.
- Instructions on how to use short rows to make nice corners in your trim (you should be experienced doing short rows to try this).
- Musings on how to sew it all together.
1. Is it time to cable yet?!
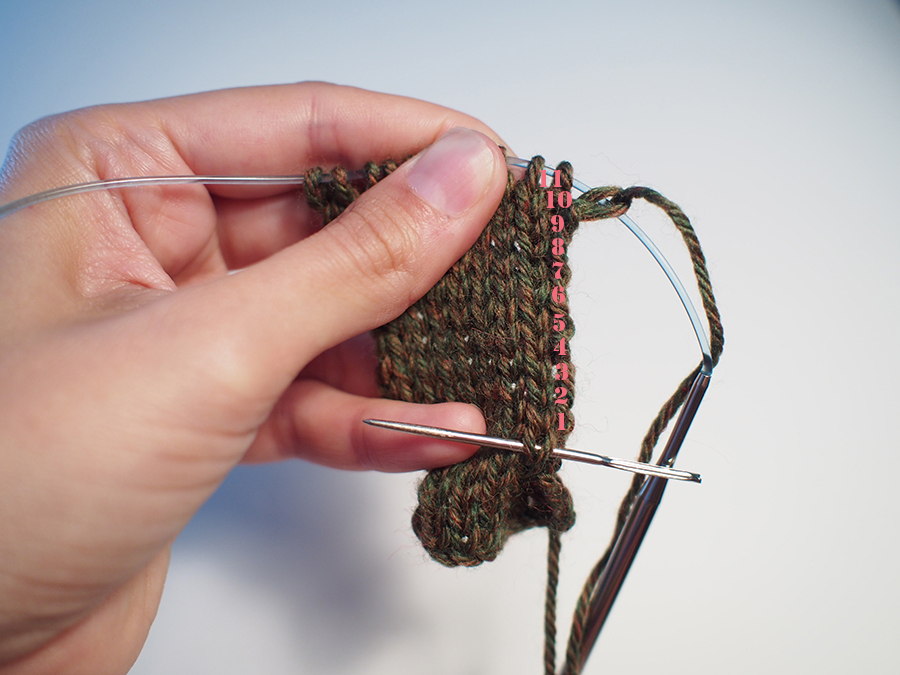
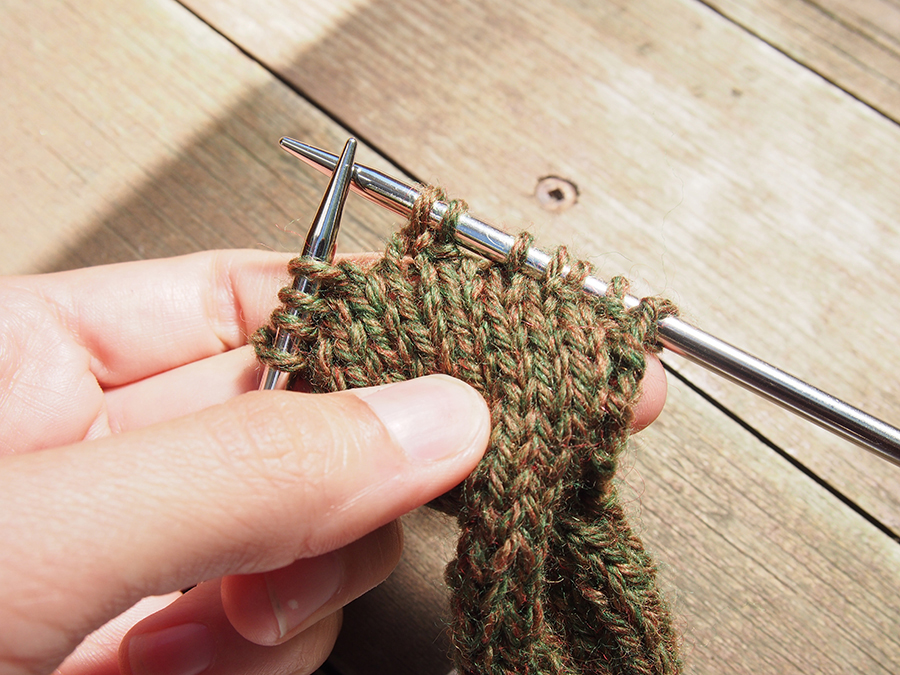
Even experienced knitters need to constantly look back and see how many rows have been done since the last cable. (Well, in my case, I'm too lazy to use a row counter!) This trim is a wide cable, C9B, and is done relatively infrequently, every 12 rows, making it something you really do need to count instead of just eyeball. I found this was a good way to figure out where I was:
Find the cable hole.

Stick your pinky in it, or stretch it to see the bar between stitches right above the whole. Stick something into the stitch that runs right into that bar, or just remember where it is.

Then count above that stitch to know exactly how many rows you've done!
 |
| Time to cable! |
One more trim knitting tip: When attaching new yarn to the trim, make sure to do so on the inner purl st side where it will be sewn so that the ends get hidden nicely in the seams.

2. An alternative cable trim
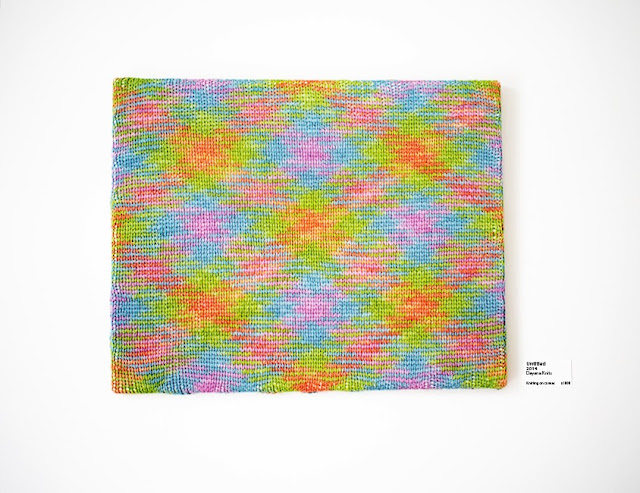
I did think that the original trim cable was bulkier than I wanted. But I wanted to keep true to the general design of the pattern and even widen it. Since I used only one color for my afghan, I actually only used 13.25 100g balls to knit all the squares, leaving me with 3.75 left of my 17 balls. The original trim only calls for (2) 100g balls. NOTE: The following trim will need about 3 balls or less.
I decided to widen the trim by half, from 11 sts to 15 sts. I split the big cable into 2 cables, and added a purl row in the center to flatten it a bit. I like it! It's still a bit more ornate than I might have liked, but it does do a good job of binding the blanket together.
Original pattern:
RS: P2, K9 (11 sts)
Cable row: P2, C9B
My pattern:
RS: P2, K6, P1, K6 (15 sts)
Cable row: P2, C6F, P1, C6B
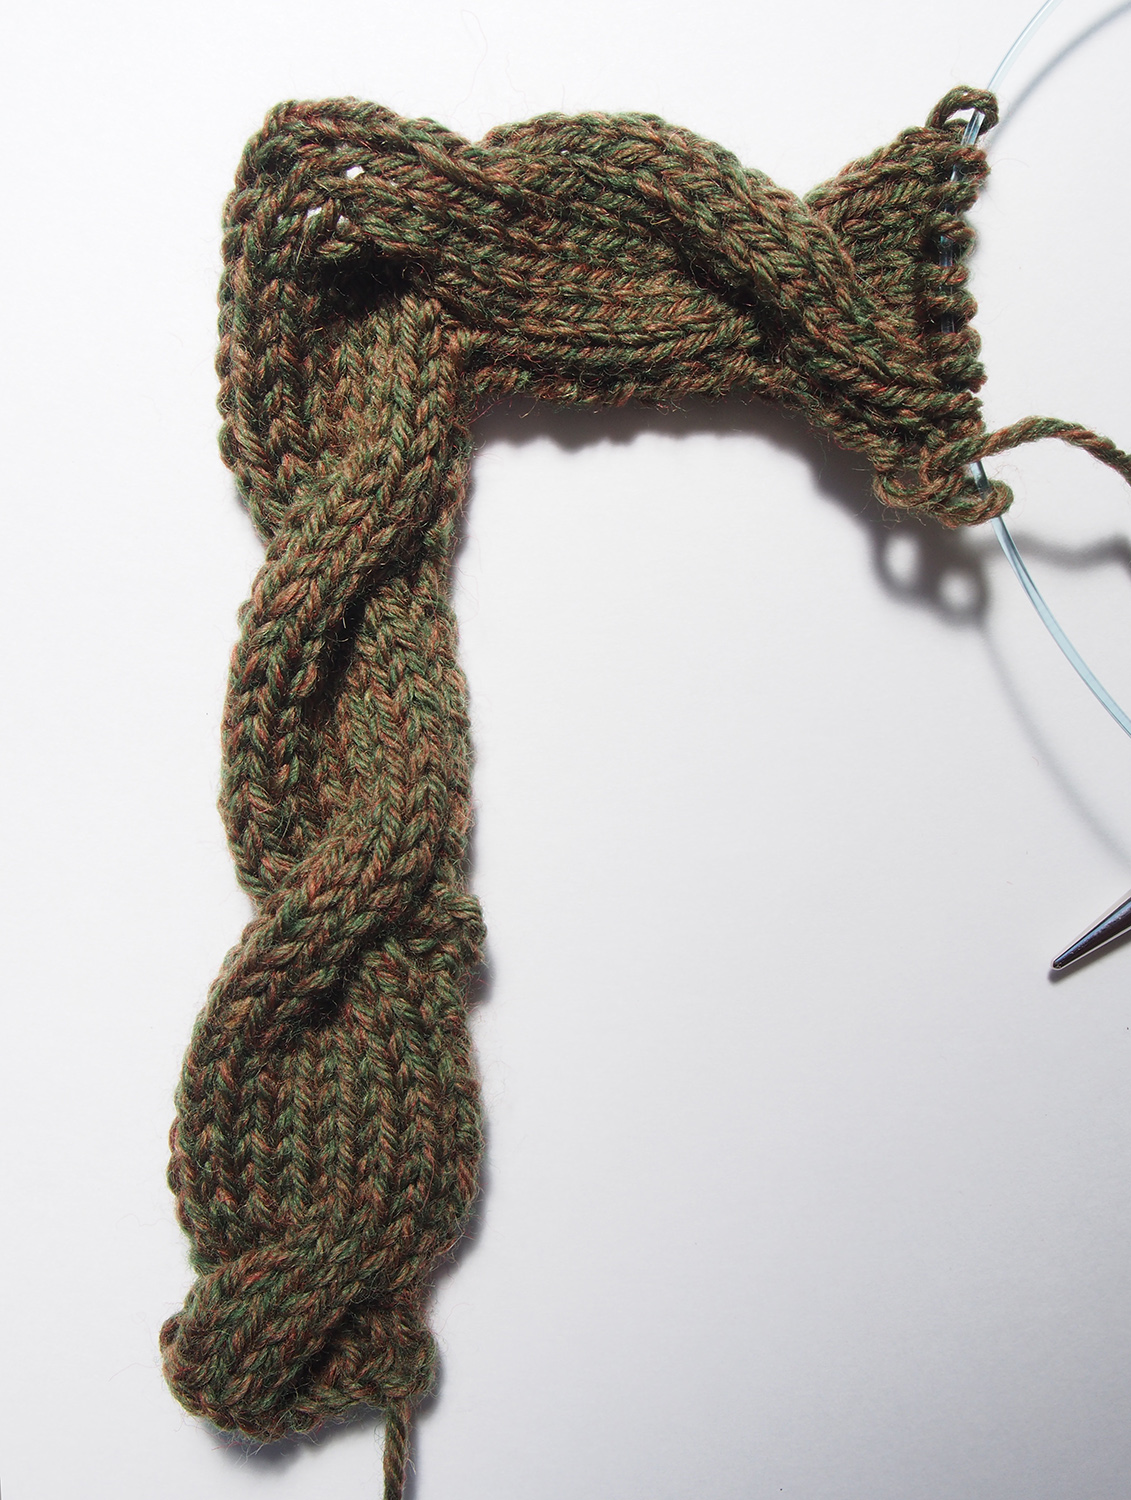
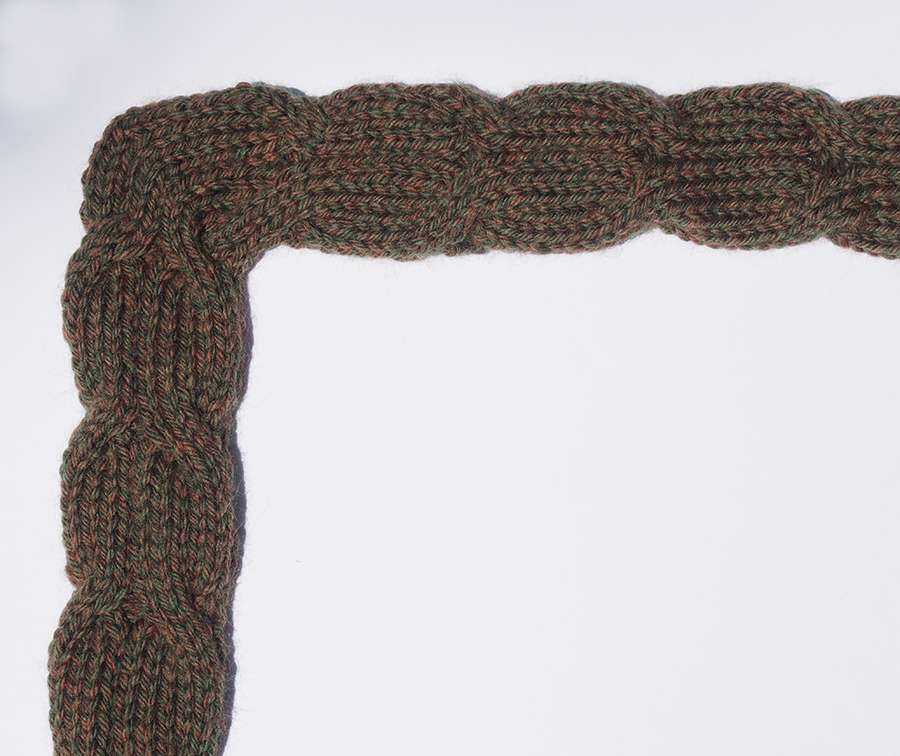
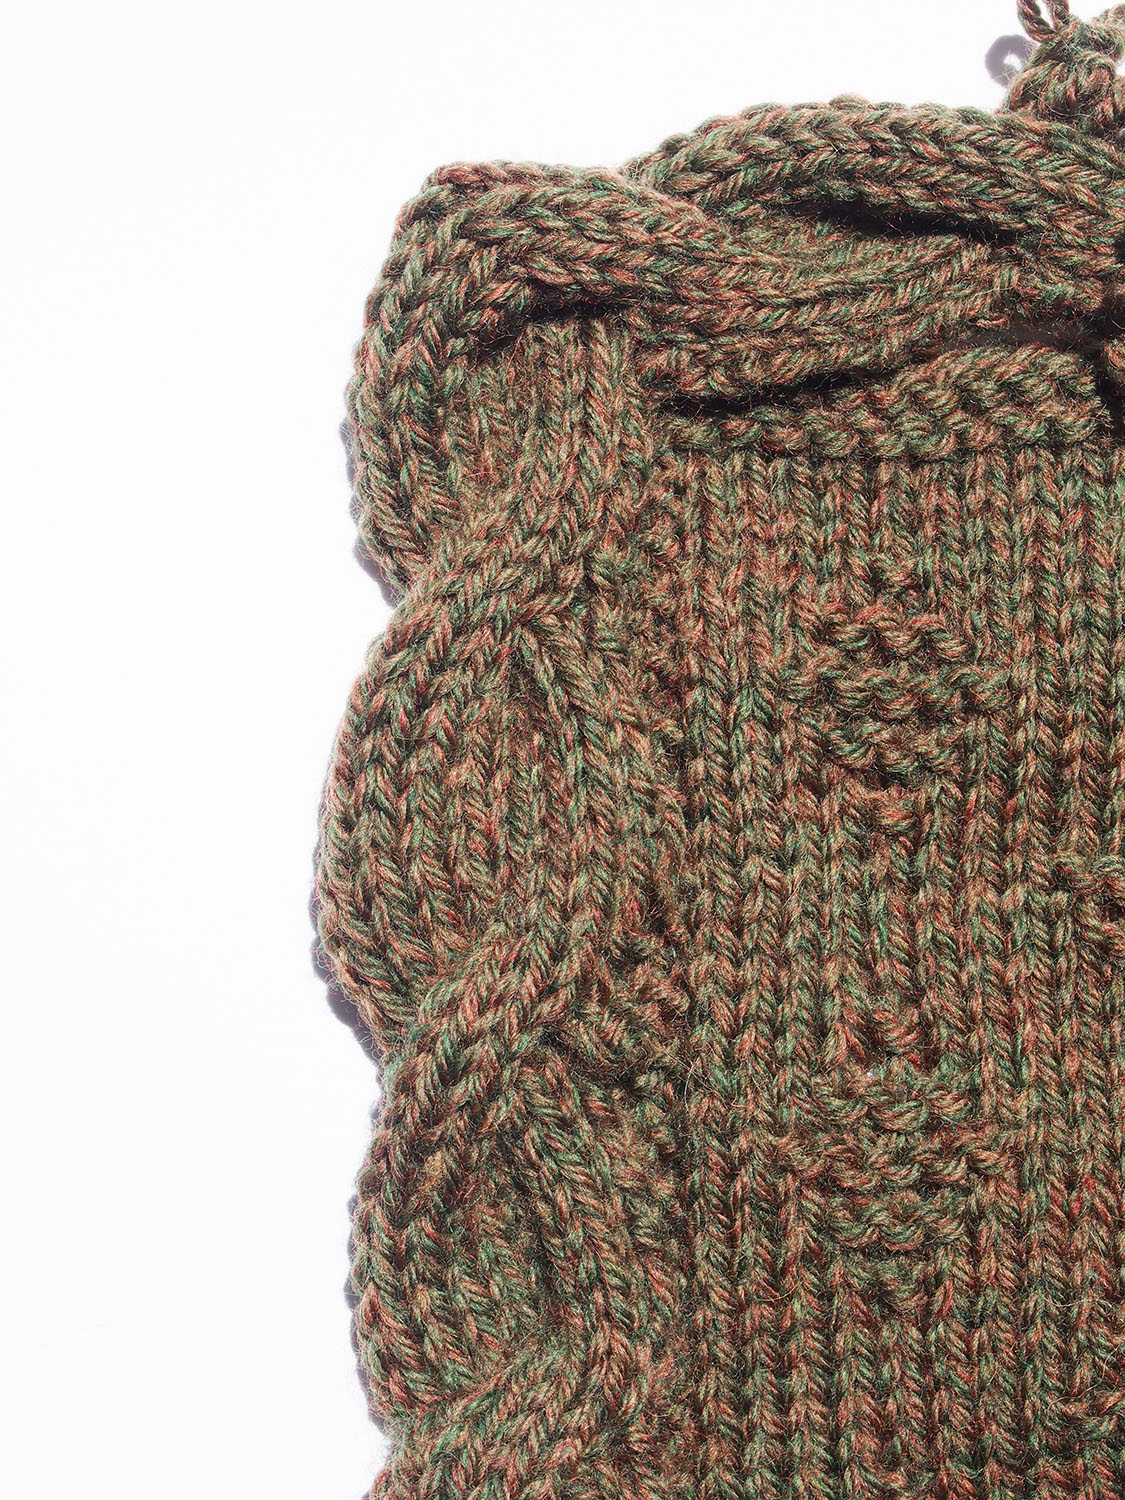
3. Pretty-as-a-picture-frame corners
Another issue I had with the trim was the corners. They are rounded (for ease), but honestly I knew that my attempts at sewing a right angle to an arc was not going to be neat enough for me.

I thought, how could I make corners out of this trim? Well, it's not so different from turning a sock heel, so why not use short rows?
I came up with a formula that can work for any trim you might choose, cabled or not. Because of the way the original pattern was written, all the wraps are done on the wrong side (to turn the corners to the right). You can easily change this by putting the P2 at the end of the RS row instead of at the beginning. But for consistency, I'll demonstrate how to do this using the pattern as written.
First I'll give the recipe, then I'll show you in detail with photos how to do it with the original pattern trim.
Short-row Corner Formula:
1. Cast-on provisionally (for grafting later) or cast-on regularly. For a regular cast-on, you can do a seam or pick out the cast-on at the end to graft.
2. Arranging squares close together as they would be sewn, knit trim to close to the length of one side and BLOCK IT. You can do this by steaming with an iron, flat out ironing, or pinning and wetting overnight. Re-fit the edging, adding or removing rows as necessary so that you end right at the corner of the afghan. End with WS facing.
3. (WS): Start short rows: Pattern to 3 sts remaining, wrap and turn.
4. (RS): Pattern to end.
5. Pattern to 3 sts before last wrap, wrap and turn.
6. Pattern to end.
7. Repeat from #5 until there are less than 3 sts before last wrap, WS should be facing.
8. (WS): Pattern to first wrap, wrap and turn. This will double-wrap the st.
9. (RS): Pattern to end.
10. Pattern to next wrap, picking up and working double-wraps and wrapped st together when you pass it. (See photo below for detail on how to pick up and purl double-wrap sts from the WS.) Double-wrap st and turn.
11. Repeat from #10 until no wraps remain, patt to end.
12. (RS): Continue in pattern.
**NOTE: If you want this to be perfect, you should try and continue your cable during the short rows (but don't cable any wrapped sts). The alternative is to wait to cable until all the short rows are done. It's worth trying both ways to see what you like, as it really depends what row of the pattern you start the short rows on. If you start the short rows right after a cable, you'll be fine. If you start right before a cable row, I recommend cabling early on in the short row process. Important: You actually don't need all the cable stitches available. For instance, with the original pattern, if you only have 8 unwrapped sts instead of 9, just do a C8B instead (or rather hold only 3 sts to the back instead of 4), no one will notice, not even you. ;)
Photo detail:
 |
| Pattern to 3 sts remaining. |
 |
| What the wrapped stitches should look like. |
 |
| Patterning to 3 sts before wrapped st. Wrap and turn. |
 |
| All the single wraps are done. |
 |
| Pattern to the first wrapped st. Double-wrap and turn. |
 |
| Where the double-wraps are. |
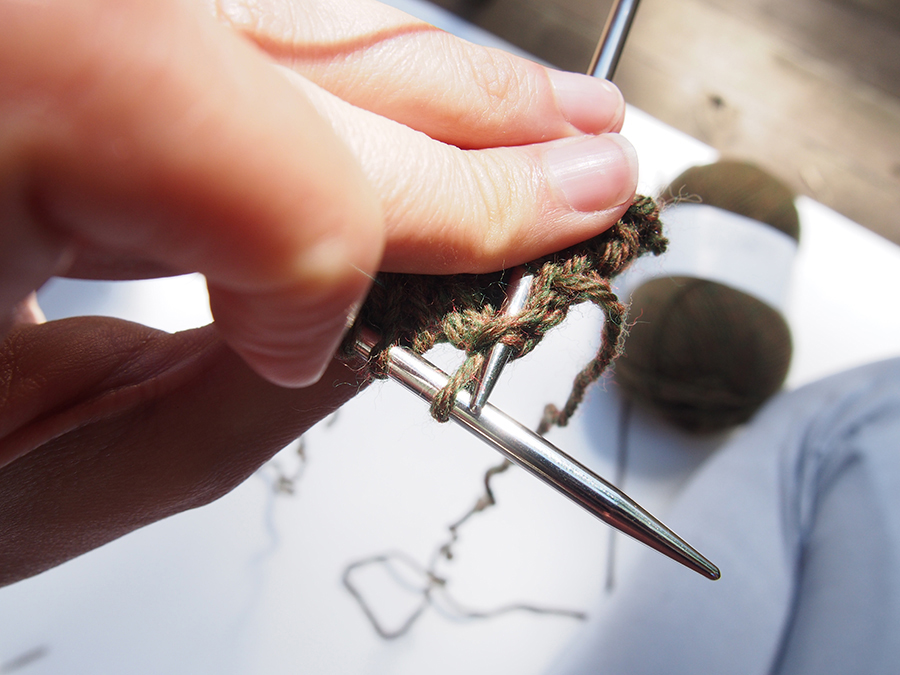 |
| To purl, pick up the double wraps from the bottom to the top, from the right side. (To knit, pick them up from the wrong side.) |
 |
| WS view of picking up the double wraps to purl. Place double wrap on needle to right of wrapped stitch. Work all 3 together. |
 |
| Double wraps and wrapped stitch, ready to be worked. |
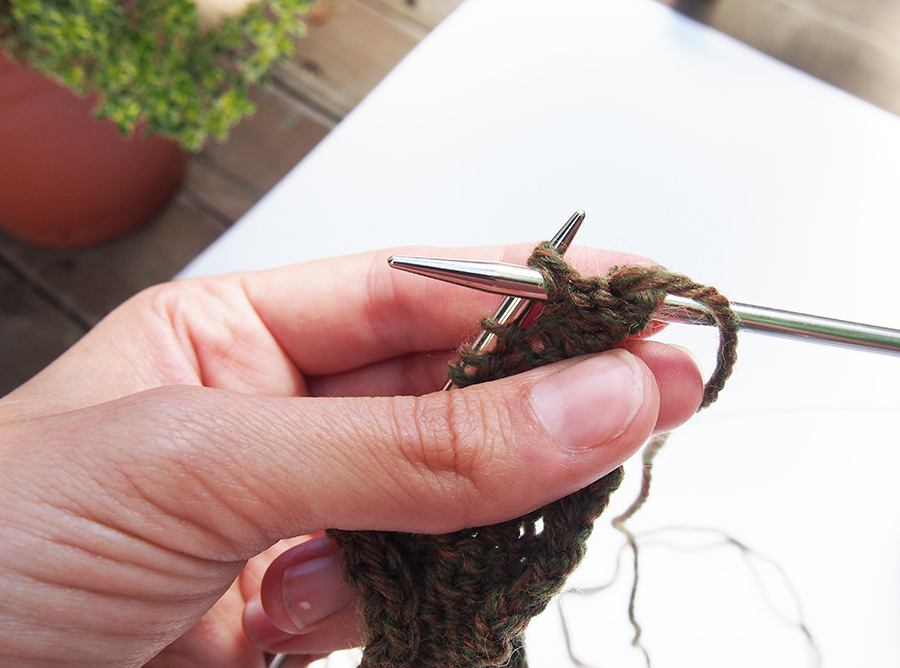
 |
| You've turned a corner!! |
4. How to sew this baby together!
I decided I didn't need the make-up clue because I was doing a one-color afghan and could figure something out. I liked the idea of putting all the blocks diagonally. I tried to alternate cables with other style motifs.
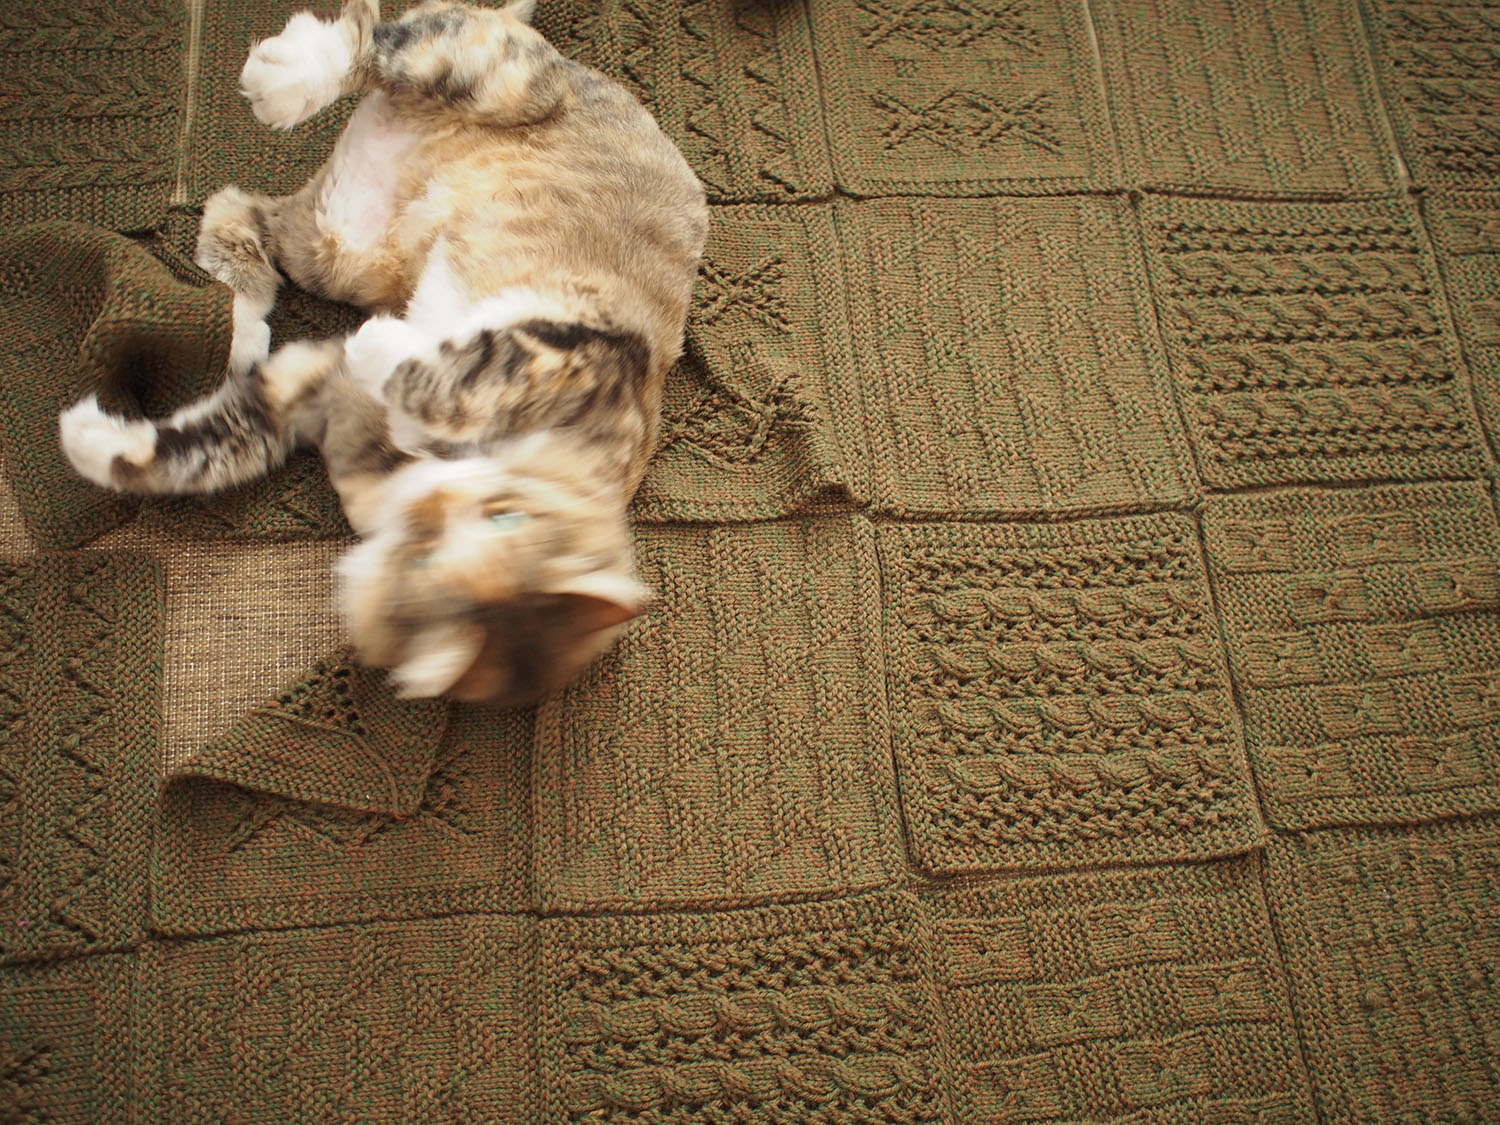
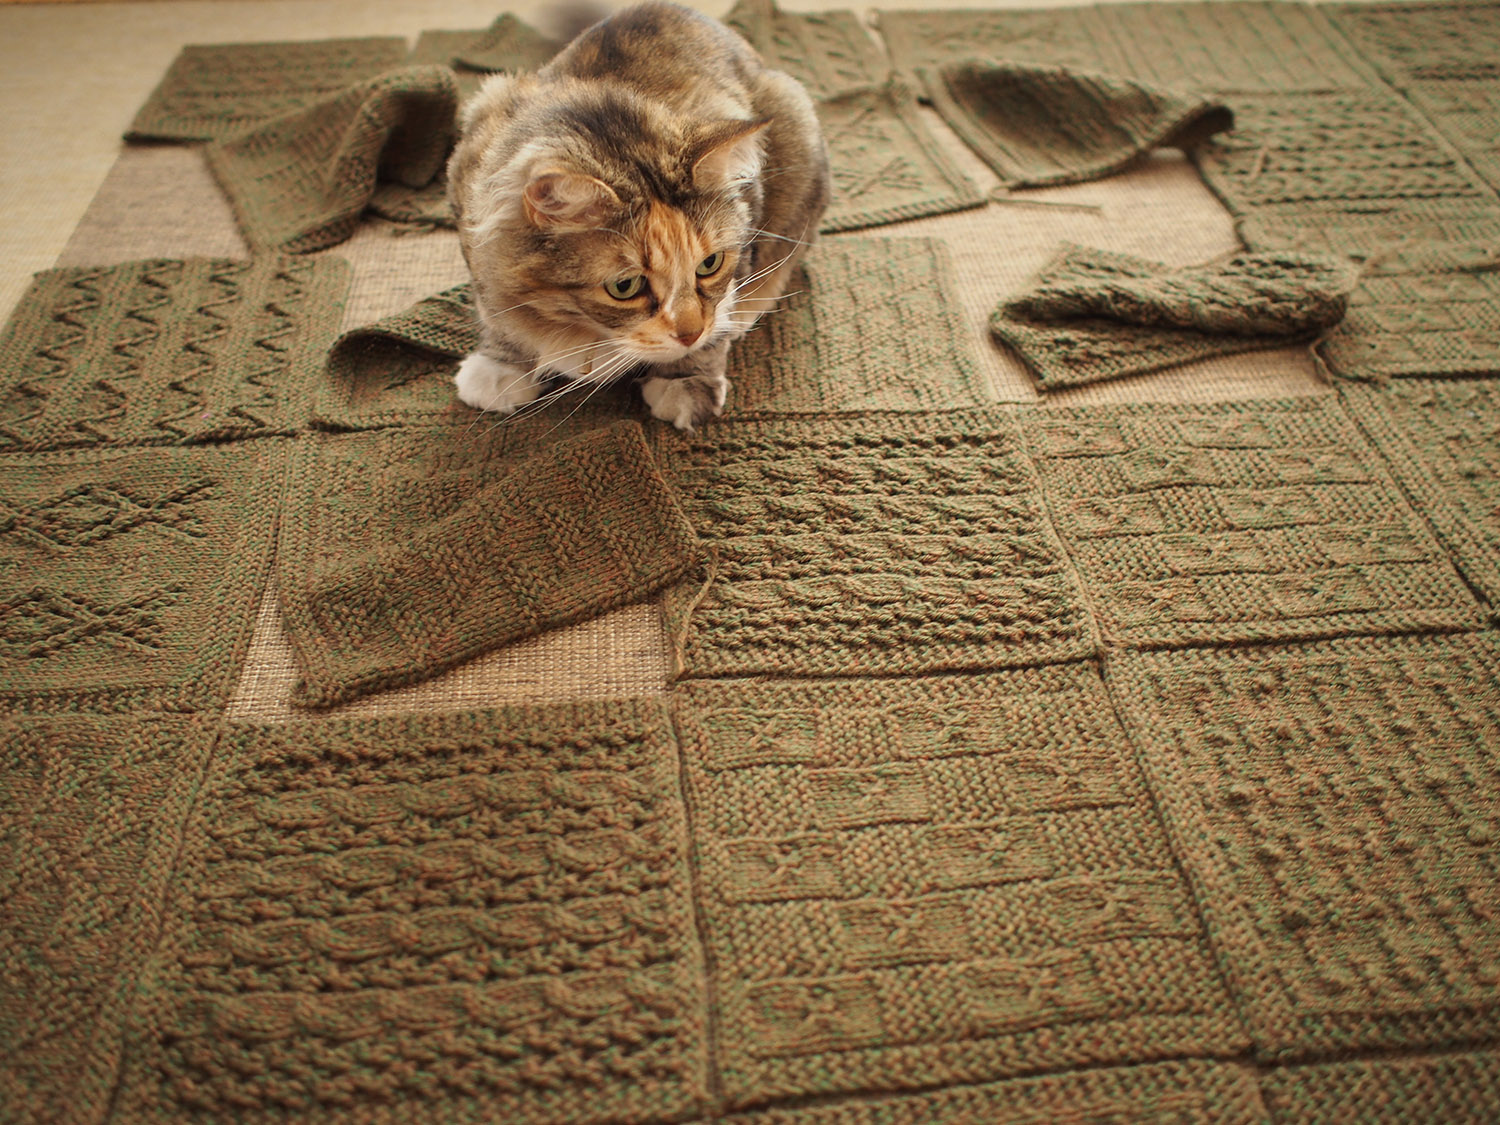
I'm not sure Neighbor Cat agreed with my choice.
 |
| "Oh, this looks so neat and tidy." |
 |
| "But this square should be over here." |
 |
| "Actually, NONE of these squares are right, human!" |
 |
| "That's better." |
As you may remember, I love using slip-stitch crochet to seam my garments. It's a tad bulky but strong and fun to do. Anything that makes seaming fun is good in my book! However, I found that a slip-stitch crochet seam on the blanket was too noticeable and touchable from underneath, and I wanted this to be the coziest of afghans.
 |
| Lovely on the top... |
 |
| ...but bulky on the back. |
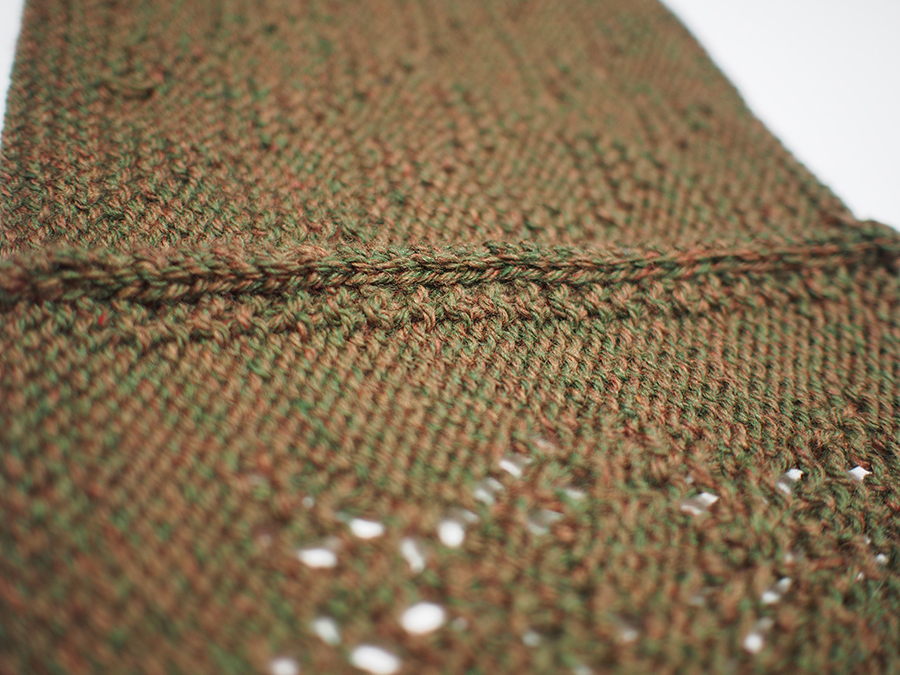
I decided on matress stitch. I made three 2x8 vertical strips using one long thread each way, and then sewed the strips together.


Then I did long horizontal seams along all of the spaces. I'm very happy with how neat it is coming out!

However, I'm disappointed with the garter border design of the squares, which don't always match both vertically and horizontally. No matter what order I put them in. Granted, I haven't seen the make-up diagram, but I can't figure out how it would work into some master plan. We shall see!
Feel free to message me for tips on All Your Afghan Needs (lower left hand corner of bottom of page). If you do try the short-row tutorial, tell me how it worked out for you! I'm looking forward to seeing your finished afghans, or "halfghans" (I'm talking to you Rebecca!)... do join us in the KAL Ravelry threads if you haven't already. :)
See my Keepin' It Square on Ravelry
Get Dayana Knits blog updates by e-mail, feed or through Bloglovin'


Hi Dayana,
ReplyDeleteFirst of all the cat is stealing the show. I appreciate the photos and notes that you provide. I agree about the horizontal garter lines being off. I wish all of the trim had been the same. I wished you livedin Victoria,B.C. because I like the square corner and I don't think I'll be able to attempt it. You're so talented and I just changed my doughnuts into x,'s and love it.
Thanks,
Marsha
Yeah, I can't compete with that cat! I have ONE idea that might though, so stay tuned hee hee. If I were in Victoria, I'd definitely come over and show ya! :D
DeleteIt's looking amazing. I much prefer your short row corner. It makes the cable look so much neater. The whole afghan is going to be gorgeous when it's finished.
ReplyDeleteThanks, I must say I was not really looking forward to the final product, but having only one seam left it's looking very very nice.
DeleteCats: natural fashion designers!
ReplyDeleteYour afghan looks wonderful! I also find it very odd that they don't give instructions for sewing up the squares before doing the trim. Is there a tenth clue that's supposed to be forthcoming?
YES. For some reason the make-up clue comes after the trim clue. This may be a photography issue, maybe there was not photo of the afghan without the trim? Anyway, should totally be the other way around. If you were knitting a sew-on collar, you would sew all the sweater seams before making it, for sure. You have to make sure for length, but you also have to know if you even like the style.
DeleteLove your short row corners, was thinking along the same lines but will use yours as it will save me the bother of working it out for myself now. However, I am going to attach the trim by knitting it on as I go. I agree with everything you said about the garter edges too. Thanks for all your words of wisdom throughout this KAL.
ReplyDeleteGreat idea attaching as you go. My only reason not to was that I wanted the never-ending trim to be portable for all the World Cup games!
DeleteI like it!!!!
DeleteThis is inspiring me to do cables. I have never tried them. They intimidate me!
ReplyDeleteOnce you start, you'll figure it out. Next, you start doing it without the cable needle... oops, I'm really thinking too far ahead! Truth be told, I find cables easy but really annoying. Too bad they look so cool.
DeleteOnce you figure out your first cable you'll laugh at how intimidated you felt - when cables are actually easy. 'just' rearranging the order of stitching. Instead of knitting sts 1, 2, 3, 4, 5, 6, 7, 8 (on 4 st twist and depending on hold in front or hold in back) you skip 1, 2, 3, 4, and knit 5, 6, 7, 8 then go back and knit 1, 2, 3, 4.
DeleteEasier when you actually do it. Honest.
I was thinking of attempting something similar through the winter months. It does look spectacular :-)
ReplyDeleteI have just finished a baby's shawl in 3ply and albeit a smaller (and lighter) piece, I edged it by incorporating the main piece and therefore removed the issue of having to sew on the very long and boring edging.
I've just read Claudine's post - aha - I see your point :-)
I'm bookmarking this for when I'm ready to finish up my KAL. I'm still have 7 blocks to knit. Exciting to be on the home stretch. I'm sticking with the original trim, but love your tips on how to miter the corners. Thanks for posting this. Your afghan is beautiful. I've been following it all along. One of my favorite colors of Rowan yarn too.
ReplyDeleteYour afghan squares look marvelous, no wonder the kitty can't leave them alone! This is going to be a total show piece when it is finished. Love your idea of the corners of the blanket as well, I will have to come back and read your post again the next time I make a blanket. :-)
ReplyDeleteThank you for this - I just turned my first corner!!!!
ReplyDeleteWoo hoo!
DeleteThank you for this post!! Excellent information!!!
ReplyDeleteСпасибо за интересный рассказ! Thank you. You are great knitter!
ReplyDeleteThe counting for cables is something I've always wanted to know how to do, thank you!
ReplyDelete