Machine Knitting Adventure! My New Taitexma TH-160


Clever, because I am hooked. (This is literal actually. I learned the hard way that you should not wear hand knits while using a knitting machine, it will grab you!)
This is a brand new Taitexma TH-160 (knitter) + TR-180 (ribber) 6mm mid-gauge manual metal bed machine. Let me translate:
- "Taitexma": This machine is a Taiwanese version of the Silver Reed (Japanese name)/Singer (NA name)/Studio (European name) SK-160 (6.5mm). The SK-160 was the updated version of the plastic bed LK-150, a machine you can still buy new all over the internet. The look is styled after the Brother KH-230/KR-230 bulky machine, though not the same gauge.
- "Knitter" vs. "Ribber": You can do stockinette, intarsia, shaping, tuck stitches, slip stitches, colorwork and more with a Knitter alone. Everything is knit though, no purl is possible (that means no garter stitch, either, by the way). If you want to do knit and purl in the same row like in ribbing, you need the second "ribber" bed (on the bottom of the picture above) to accomplish that. Before you ask though, the knit and purl needles will always be knit and purl -- i.e. you can't do moss stitch without manually undoing the stitches and re-doing them. The ribber also allows you to knit in the round by connecting the stitches between the knitter and the ribber into a circle.
- "6mm mid-gauge": Machines come in 3 common gauges, which is the space between each needle that holds a stitch. 'Standard' is the small gauge (4.5mm) and uses up to fingering/4-ply yarns. 'Bulky' (9mm) accommodates worsted through bulky yarns. 'Mid-gauge' is ideal for DK and worsted yarns, but works with sport and smoother chunky yarns. Yes -- the yarns you probably already have avalanching out of your craft room. That's definitely what I needed to start finding my way to the door!
- "Manual": There is no electricity here. You mount stitches by running a carriage over a set number of needles, sort of like a loom shuttle. The gauge (here I mean the classic handknitter term) is controlled by the tension on the thread. Small tension = more stitches per inch. This machine (like all mid-gauge machines) does NOT have punch cards, which are little printed patterns that the machine can read to knit the next row.
- "Metal bed": Beds (the place where all the needles go) can come in plastic (less sturdy but portable) or metal (lifetime).
Phew! Was that too much? Don't worry, this post isn't a tutorial on how to machine knit -- instead, it's a chronicle of what I was able to do in a matter of TWO DAYS right out of the box. And remember, I knew nothing at all about knitting machines as of two days ago.

I decided to follow the Knitter manual from front to back. First the basics: stockinette. You choose the number of needles you want to knit with, and then run the carriage over them so that they pick up the stitches. Play with the sound on, it's loud! In fact, a friend recommends ear plugs if you do this a lot.
 |
| (punchline is below) |
I then learned how to bind-off, which took way longer to do than a hand knit bind-off because they have you manually transfer each stitch in 3 tedious steps. A YouTube search did reveal much quicker options. Here it is coming off the machine. Sound on, again!
I cannot believe how perfect the knitting is. People joke and call me a 'knitting machine', but now I know that is not the case.

I should mention that you change your gauge by changing the tension dial on the carriage, which goes from 0 to 10. I was impressed that the number on the dial gave a gauge that was very close to the US needle size you would use. So if you are using a hand knitting pattern that is US7, I would start a gauge swatch at tension dial 7, knit 20 rows, then change to 8, 20 rows and 6, 20 rows to see how it changes. 60 rows sounds like a lot, but it will take you 4 minutes to do, seriously!
Changing row gauge is not really possible, but I found it to be quite similar to hand knitting on this machine.
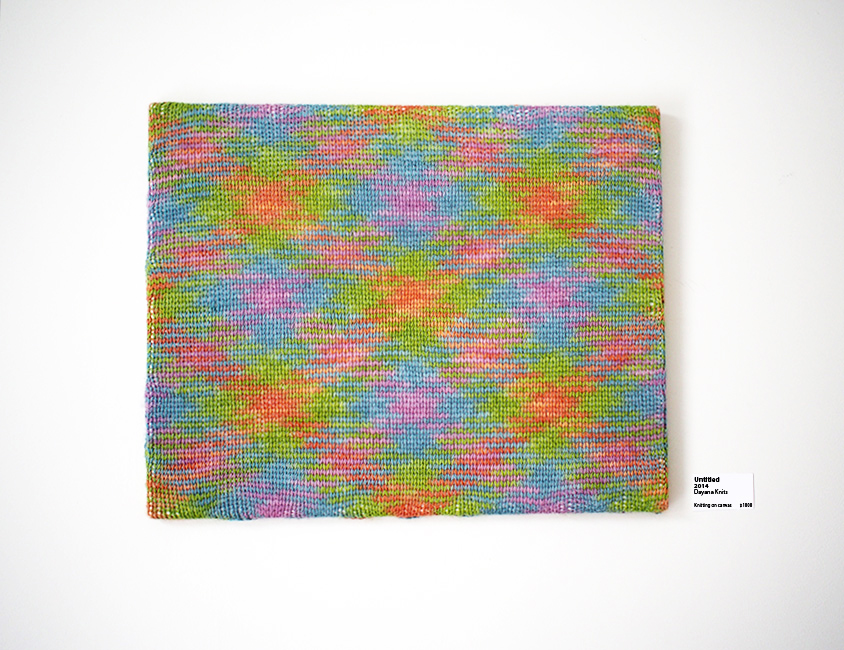
I was wondering what I was going to do with this big brown acrylic piece... and omg it fits perfectly as a backing to my vintage rhino needlepoint I did last year!
 |
| That bottom thing is the "cast-on comb" that you attach weights to. The stitches are live. |
Oh my, your workload definitely comes quicker with a knitting machine. Now I have to find and insert and sew a pillow for a project I had NO intention of finishing in 2019! 😂
Next in the book was a big jump in skill level: intarsia. Whoah, I still don't understand how it works -- instead of using the yarn feeder everything is done with the yarn lying in front of you on the floor. Things were going well until all my needles dropped their stitches and what I thought was a tree became a stump. 😅

Next came slip-stitch patterns. I bet there's a ton you can do, but my book only had a few. To slip a stitch you just put the needles you want to skip in a different position and then switch a lever on the carriage to ignore those stitches. Here's the "tuck stitch".
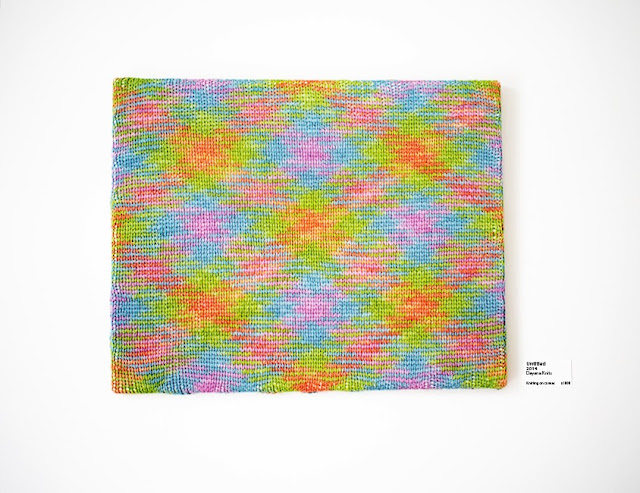
And here it is with 2-different colors.
So pretty and all you do is switch a knob and move some needles occasionally. You can follow everything with a chart like this:

Next was a cool "skip stitch" that I'm not even sure of how to knit!

That's one of two reasons this whole unexpected endeavor is interesting to me. First, it will let me do stitches that are not typical of hand knitting, or tedious. Second, it lets me get through mundane knitting like stockinette or ribbing to be able to get to the interesting hand knitting part.
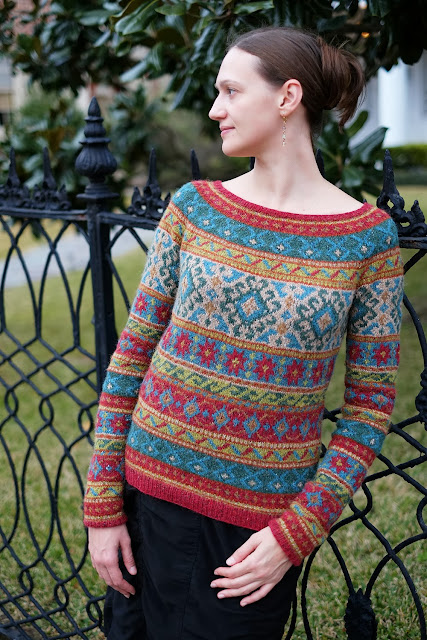
Next was using slip stitch to do mosaic colorwork. Gosh, it's so perfect looking, it really does look like fair-isle!

Finally, the Knitter can even cable -- with some major finagling on your part.

I'm not sure I'd be able to get through a cabled garment without messing it up though, because you have to transfer stitches manually using crazy tools like this!

Do you remember me mentioning that the Knitter was only half of the machine?! Well, I had to move to a new table once I attached to Ribber onto the Knitter. Look at this thing! At the end of the movie it will go up and show you the alien praying mantis-like yarn tensioner.
The two beds have their own carriages, but they get linked so that they move together at the same time. In this movie, you'll see how the stitches look in 1x1 ribbing when they are set up.

You might be able to tell that this more like a slip stitch ribbing. That's because the easier way to do it only uses half the needles at any given time. The first barrier I hit was trying to do the full needle ribbing, my carriage kept getting jammed. That'll be the first forum answer I'll be looking for!
But staying with the simpler way, 2x2 ribbing wasn't far behind. I even learned how to take it off the Ribber and continue in stockinette on the Knitter! Can anyone say.... SWEATER?!

I think my first full machine knitting project will be just like this. Ribbing and boxy stockinette with drop shoulders using a beautiful stash yarn I never knit with because it's too busy for anything but. Like this one by Shirsty Cat Designs that has been languishing in my stash forever!

Ok. Can you believe we are still on Day 2?? Well, there was one more thing in the book and you might not believe it... you can knit in the round!
Now before you get too excited, you can't rib in the round... but you can totally keep the stitches live and do toes, ribbing and an afterthought heel on your own. Then again, I know nothing (yet) so I'm sure there are even more unexpected things to do with this amazing machine.
And that ends my 2-day adventure! I took today off to write this blog but the machine is calling to me 👀. What will be my first project? I'm going to try to get through the boring ribbing on this Anny Blatt number (Bela from Book 221) so I can get to hand knitting the floof right away!

... and JUST THINK how much more I would have enjoyed these recent projects if I had been able to machine knit the endless stockinette on the back of my Martin Storey KAL pillow or my Bowland Poncho side panels!


For those of you interested in getting this machine, it is available at All Brands. Taitexma also makes standard gauge and electronic machines.


For those of you interested in getting this machine, it is available at All Brands. Taitexma also makes standard gauge and electronic machines.
Do you have advice for me or just want to ooh and ahh and ask questions? Leave a comment here!
UPDATE! See how I made a yoke sweater mixing hand and machine knitting using my Taitexma: https://www.dayanaknits.com/2021/03/Combine-Hand-And-Machine-Knitting-Yoke-Sweater.html

Follow @dayanaknits on Instagram


Thanks for such a great post! I always wondered what the learning curve was for these machines. Can't wait to read more as you learn! Happy knitting (and happy birthday)!
ReplyDeleteAww, thank you so much! I hope to have another post with a little more "hmm moments" to show what it's like after a couple of months now.
DeleteWhat a wonderful gift this is!
ReplyDeleteI'm very impressed with the progress you made i just 2 day's. I've been thi king about buying a knittingmachine, but the thought of a long learning curve withheld me from really going for it. Now it seems more possible 😃
So thanks!
WOW! Such a successful surprise present. I'm so glad you're enjoying it - and blazing a trail for those who have always wondered about machine knitting.
ReplyDelete-- Gretchen (aka stashdragon)
Thank you Gretchen, for always being so supportive! I think it's the right gift for me, who loves figuring things out. Maybe not for everyone though, lol.
DeleteWhen you were knitting your poncho, I thought of how much easier that long, boring part would be on the machine. A knitting machine allows you to be productive, with professional results, right out of the box yet continue to learn and create for years and years. I’d recommend you pick up a copy of “Hand Manipulated Stitches for Machine Knitters” by Susan Guigliumi. She has excellent video courses as well.
ReplyDeleteThank you so much for the reference, I will definitely pick up that book and check out her videos! It's been a month now and I've learned so much through trial and error. A lot of the tips that have been the most useful have been from videos. My biggest breakthrough the other day was realizing that I didn't need to do short rows to do a shoulder, that I could just use the "part" function on my dial to work on the section I needed without touching all the other stitches. Mind blown! Oh, and that if you have a cable that's really pushing the limits of your needle stretch, put the needles in holding position to make it easier on the carriage. Duh, such a difference!
DeleteCongratulations! May you enjoy many beautiful creative moments on your delightful machine. I'm sure you'll manage quiet well. Tailored dresses and lace would be an interesting future endevour. I'm sure your up for the challenge?
ReplyDeletePlease keep posting your wonderful adventures and beautiful works of art!
Dresses are FIRST on my list!! I love sweater dresses but the ones on sale always have arms that are too short. And I just found some DK cones on sale that have enough yarn on them for a first salvo!
DeleteWonderful gift and learning curve for you. Amazing what you have picked up in just a few days👍. Looking forward for more of your work on the machine 👌😊
ReplyDeleteYay! Sorry for the late reply, but I've been using the machine for a month now and am so excited by what I can do (and how I can creatively use my stash). I will definitely report in the next month!
DeleteI'll be following to see what you think of this machine after you've used it for a while. I have a much-older Brother bulky KH 230 (I think)w ribber and no automatic patterning, and was thinking of investing in the Taitexma, same setup, just a different gauge.
ReplyDeleteOh good! I have now made 2.5 garments on this machine and I am very pleased with how it works. I've learned a lot about what it likes and doesn't like and I've pushed it quite a bit to the point where I'd be worried if I had a plastic bed instead of a metal bed! It seems to be able to do most anything I need. Yarn overs, different increases/decreases, cables (to a point, I wouldn't want to do a 4/4 cross too often) colorwork, ribbing, circular. Garter is a challenge, but that's the case with all machines. What I love most is that I can use from fingering up to chunky weight pretty well. The tension dial does an amazing job giving me different gauges. You can't get a tight fingering sock naturally, but you can get a supple fingering material that is totally great for a sweater. Chunky makes the machine work a tad too hard, but I bet you could use it on every other needle and it would be perfecto. I wouldn't pick another weight machine to start with to be honest, I'm that happy with it. And for a new machine, I wouldn't pick another brand (and anyway, I'm not sure there is any other company that makes mid-gauge new anymore). The Taitexma worked beautifully right out of the box and it came with tons of tools and weights and cast-on bars, etc.
DeleteThey do have an automated one, but it's standard or bulky. I just don't want to buy new yarn just to use my machine. I've got enough wink wink. Anyway, ask me any questions any time, I have a blogger contact form at the bottom of every page.
Wonderful. I am glad you are enjoying your machine knitting journey. The sky's the limit. And Susan Guigliumi's books are well worth the purchase. I have several machines, some of which I have still to work with. I am currently using the 6mm mid guage for 8ply/dk work.
ReplyDeleteThanks so much for the book reference! A whole new library to create now... 😱. The 6mm has really been a great gauge for what I’ve been working on. Very pleased!
DeleteWelcome to the wonderful world of machine knitting! I myself got a standard machine a few years back and I love it. Thought I should mention that standard machines use fingering/4 ply as it's happy yarn so it is actually feasible to hand knit a jumper that you could make on the machine (though one of the main reasons why I bought a knitting machine was to make the fingering weight jumpers I couldn't be bothered to make by hand!). You can also get fine gauge machines but most likely they'd have to be second hand as they're rare.
ReplyDeleteAlso your skip stitch swatch would be pretty easy to replicate by hand, you're just slipping stitches with the yarn in front with the purl side of the fabric facing you, yarn in back with the knit side.
Yay, thanks for the welcome! My only real prob with standard gauge is that I’d have to buy yarn for it. But when I think of the kinda of sweaters my husband likes I can see how they would make beautiful garments. It would also
Deletebe nice to be able to make fingering sock yarn tubes. I’ll always keep my eye out for other machines now, though, let me tell you! 😁
How much does it cost in pounds sterling
ReplyDeleteI don’t know how much shipping would be, but the set was $1100 I believe
DeleteHi! I just got a TH-160 with ribber & I’m excited to get started on it. I had a chunky machine but it was too hard for me to use.
ReplyDeleteDo you know if there is a needle bed cover available for the ribber?
Hi! There is no needle bed cover but my ribber covers for my bulky Singer 150 fits perfectly! I imagine the Brother bulky covers would work as well.
Delete