How To Sew A Hexagon Cushion Insert -- The Rowan CAL 2015


I've been a faithful Rowan Yarns Knit-Along (KAL) groupie from the start, and I've got two incredible afghans to show for it: Monocolor and, well... Crazycolor. I was excited when the next event would be a departure into crochet -- but if you were anywhere close to the entire eastern seaboard, you probably heard my salty sigh when I learned that it was another blanket... oh no no no, I had had enough of that nonsense! Those things were epic undertakings, and I was looking for more of a short story. Even better -- a haiku.
Much to my relief, the designer Lisa Richardson had my interests at heart: the same blanket motifs could be used to make a scarf or a cushion. The new homeowner in me rejoiced for a pillowy treat.

Let's summarize so there is no doubt: the pattern is great, completely free and available for you to download right now. The theme is hexagons, and they will become your six-sided friends! Well -- if you are making the cushion, they might become your enemies. I mean, when is the last time you saw a hexagon pillow insert?!
That's where I come in, my scared never-sewing friend. Allow me to walk you through a simple hexagon sewing tutorial.
First, let's start with the crochet pattern. I would say that it is designed for beginners to get used to crochet. It starts with simple hexagon motifs that progress into more difficult ones, adding new stitches with every step. There are videos to help you on the Rowan Youtube channel -- but I also suggest you snoop around the web for some extra support.
While you may know me as someone who heavily modifies knitting patterns, I'm not so confident with modding crochet. Even so, I would highly recommend replacing the start and finish with the following:
1) The Magic Ring (start)
2) The Invisible Join (end or change color)
I laugh because these techniques sound like Crochet Superheroes.
 |
| From Etsy here |
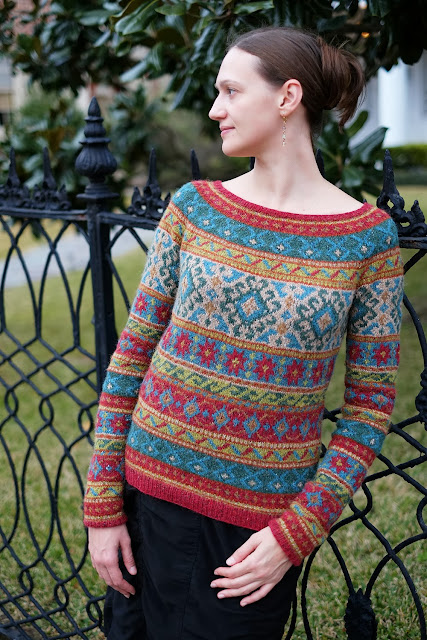
The pattern is designed for a really lovely new Rowan yarn that just came out this Spring, Summerlite 4ply. However, I wanted a rougher, more organic look to my cushion, so I substituted with Rowan Fine Tweed.

I am in love with the colors I chose, I really must make a sweater in this combination. My Ravelry project page will give you the exact amounts you need, should you want to be my sweet and faithful copycat. NOTE: While the seams called for my off-white color "A", I used black (color "D") instead.
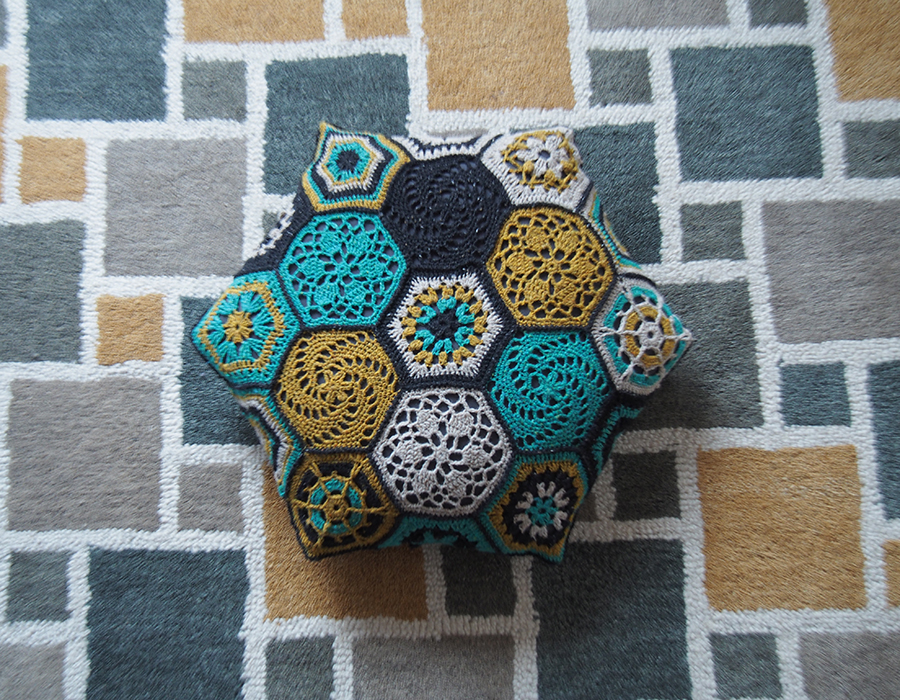
I did my own piecing map. I kept the solid colored middle hexagon 'ring' as in the pattern, but decided against having the 'sailor, sailor' navigation wheel motif in the center. I put the flowery one inside instead.
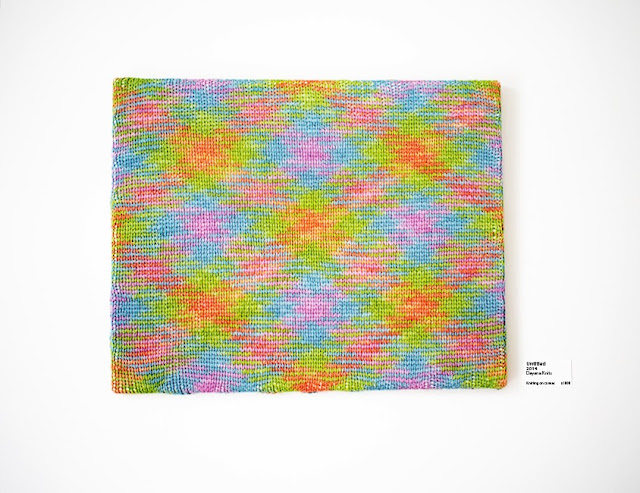
Here is the front and the back:

I followed the instructions on seaming, but made the seams stick out on the outside, which is easier - but also bumpier. However, I'm leaning against this cushion right now as we 'speak', and the seams are not bothering me at all. Phew!

Instructions on making the cushion insert:
Start with a large two-layered square of fabric. You could buy an already made square cushion, or you could buy your own material of choice. I bought 1 yard of smooth Kona cotton (used for quilt backing) and settled for gray in order to make black motifs more visible.
Block your cushion with a good stretch to find out the length of your sides. Make sure to measure repeatedly so that your sides are all the same length while blocking. I managed to stretch mine to 12" per side. The cushion will contract after blocking, but your goal is to make the insert the size of the most your cover will stretch.
There is a handy dandy "HEXAGON CALCULATOR" on the web to help you understand hexagon geometry! By keying in "12" in the "s" box, I was reminded that the diameter of a hexagon is double the side length.

It is fairly difficult to draw a true hexagon with a ruler. Just being off by a little bit on the first sides will completely shift your final sides. To make it much much easier, fold your fabric square into quarters...

... and use this guide to draw your hexagon with tailor's chalk:

Cut on the 4/8" seam allowances.

Sew the seams -- but of course, leave the last one open for stuffing! Also, leave a seam allowance's worth open on the two seams bordering the open side.
Because your seams will be on the inside, you don't have to worry much about the cut edges fraying. However, if you have pinking shears, they will add some safety. I trimmed my edges to ~3/8" and trimmed the corners very close. This is always necessary for a good pointy point.

Iron your seams open as well as you can (I used a sleeve board for the hard to reach seams) and stick a dull point into each corner to bring it out nicely.

After stuffing (I used polyfill), pin down the hem of the opening.

Then baste. Believe me, you need to baste. It's really hard to keep that stuffing in while you sew a gaping hole shut!

I back-stitched by hand, but if you have mad machine skillz, you can machine sew shut, too.

Voilà! A hexagon cushion!

Now crochet the final seams of your covering over the insert! (see my Ravelry project page for my seaming order for the crochet motifs)

You may have noticed that a lot of my pictures have outside light... I set up my entire "sewing room" on my deck! It was a dream.

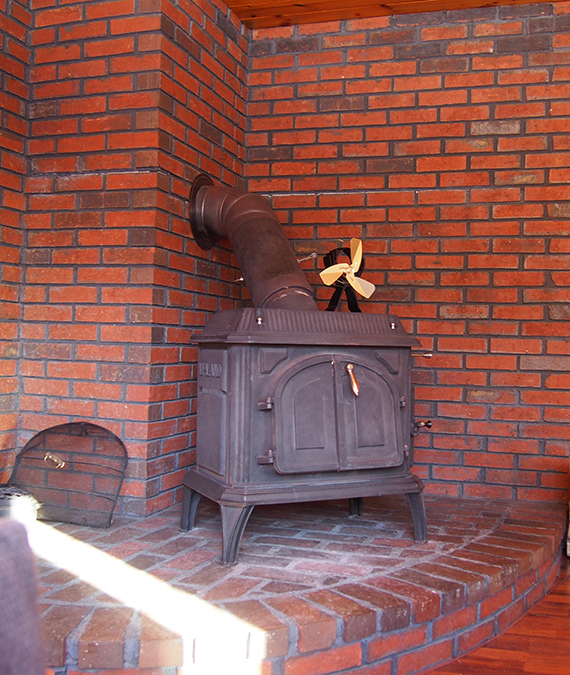
Even more dreamy is my cushion's new home in my built-in reading nook. It's really wonderful, I'm so pleased.

Jealous? Don't worry: you, too, can have one!! Download the Rowan pattern here.
See my Hexagon of Hexagons on Ravelry

Would you like to follow my blog?


Great tutorial and I love the idea of a built-in reading nook.
ReplyDeleteThe next fun part in this reading nook will be to reupholster the existing cushions. The fabric pattern is not nice AND there is no zipper to remove and wash it, what were they thinking?!
DeleteWonderful work - so impressed.
ReplyDeleteGreat looking pillow!
ReplyDeleteBravo! It totally belongs to your reading corner. And I love your open air creative space, really a dream !
ReplyDeleteThat is one beauty of a cushion. Now you can make one of those lovely cabled bolsters in a solid color to tuck under your elbow so you can also knit in your comfy built in reading nook!!!!!!
ReplyDeleteYou clever girl! I have a sewing book in the mail for a bolster cushion too....
DeleteDayana,
ReplyDeleteYour blogs are a treat to the eye, funny bone, and mind. Thanks for taking the time to share with all of us!
:-)
Jane
Jane, you've made my day!!
DeleteAdmirable! Thanks for inspiration and another great tutorial.
ReplyDelete-- stashdragon
Looks amazing! Great post too!
ReplyDelete