Sometimes You Should Settle for Something You Will Wear


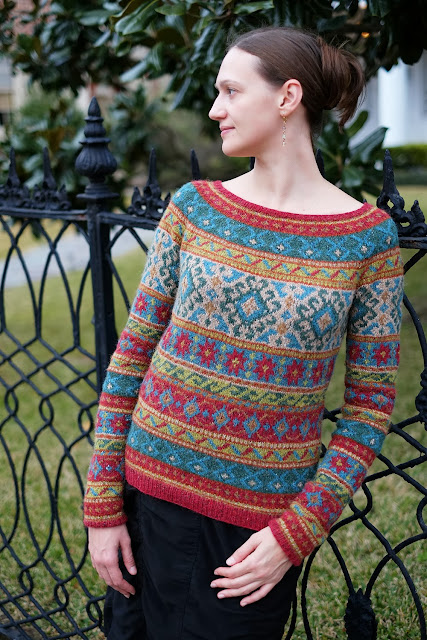
Sheer is in, and nothing is more elegant than a sheer knit. My eye was immediately drawn to Marshmallow by Julia Frank, from the back cover of the Spring/Summer Rowan Magazine 53.

It's made with my favorite kid mohair/silk yarn, Rowan Kidsilk Haze. This yarn has a cult following, you know. There are over 36K projects with Kidsilk Haze on Ravelry alone!
It's addictiveness and cost have earned it the name "Cracksilk Haze". I concur.

Here is discontinued color Violetta (why oh why?), reflecting the incredible palette available. (photo courtesy of Espresso345 on Ravelry)

So, get this. Kidsilk Haze may be expensive, but this pattern makes an entire sweater with only THREE balls for sizes 32-42... wow. The i-cord embellishment only needs one ball of Rowan Handknit Cotton, but really, you could use anything you had in your stash.
Now, I complain about Rowan patterns all the time for being 'stuck' in the old times. Seamless, circular knitting is pretty rare, so imagine my delight when I saw that this was knitted in-the-round!

Ok, I love seams. I do. They stabilize a garment and make it easy to adjust for fit. However, seams are not ideal for sheer knits, and I'm very pleased that Rowan agrees with me. Seams will pull at the extreme lightweight fabric, and will look quite messy from the sewing.
I went a step further and modified the pattern for seamless set-in sleeves, which are picked-up from the armhole and knitted downwards. This is a most fabulous technique I learned from Samantha Kirby and her Emanating Sweater pattern. This formula is excellent for slim upper arms and a gorgeous negative ease fit. Play with other formulas for a bigger upper sleeve.


Here is the general formula I use:
- Starting at the underarm, pick up every other stitch around the armhole = X sts. Mark the shoulder seam stitch.
- Knit to X / 2 sts (shoulder seam), then knit X / 14 (or there abouts).
- Wrap the next stitch and turn.
- Purl to shoulder seam, then purl X / 14.
- Wrap the next stitch and turn.
- Knit to wrap, picking it up.
- Wrap the next stitch and turn.
- Purl to wrap, picking it up.
- Wrap the next stitch and turn.
- Repeat Rows 6-9 until you reach the very beginning of the underarm shaping slope. If you continue to short row until the underarm, you will get a strange pouch. (To be more specific, from the bottom-up, an armhole binds off some stitches, then has several rows of decreases before continuing straight with no more decreases. Only short row the 'straight' portion of the armhole, not the decreases.)
A concrete example: If you pick up 70 stitches, knit to 35 sts (shoulder seam), then knit 5 more stitches (70/14) before starting to short row.
It looks really lovely, almost like a special 'fashioned decrease'. Even my husband (who didn't know about what I did) remarked on how excellent the stitching looked around the armholes.


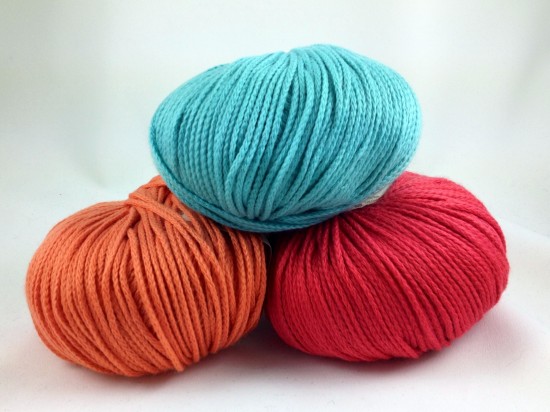
For the i-cord embellishment, I played with Rowan Softknit Cotton. This is a buttery-soft 'chainette' yarn made of 92% cotton and 8% nylon and is machine-washable. I would love to make an actual garment out of this stuff, it is a gem of a yarn to knit. My only concern is how it will wear and tear. It's very very soft you see, and I can see an aura developing.
Here is a photo of the yarns from ImagiKnit.
NOTE: For the applied i-cord at hems... don't use a smaller needle as they recommend! It will gather in the fabric, i-cord is really tight. I had to use a larger needle AND knit the i-cord very loosely to get it to the same width as the Haze fabric!

I attempted to use this machine to i-cord the entire ball.

It came with a VHS tape and a pattern book to make, OMG, all the things!!

It's kind of a crappy machine. I needed to pull heavily on the emerging i-cord for it not to make an infuriating slip off the little hooks. This made my cord flat, stretched and rather ugly. But I was impatient. I mean, who enjoys making 40 yards of i-cord?!
I didn't really have enough for the embellishment pictured, and besides, I didn't really like it. So, I experimented.

And here we come to the title of this post. Sometimes you have to realize that there are design elements that are interesting but not necessarily a good idea. And that sometimes, your precious knits will get moldy in your closet because of bad design decisions.
For instance, this AWESOME message that should be written across the sky daily, was alas, far too heavy for the fabric.

This one was very artsy, designed by my husband, with a 'belt' that would tie in the back. Cool! No real sewing needed except at the hems!

But then, a very clever lady asked what would happen if I sat down. Mmm-hmm, yes, a very good question.

So, the fix to that would have been to tack down the i-cord all along the fabric. And I just sighed with pain and thought, man, 1) this is gonna pull on the fabric and droop it and 2) I might always be adjusting it because of the droop, etc, and 3) do I even really like it?
I scrapped it. Scratched it. Blueprint crumpled and in the garbage! And suddenly, without any effort, I had an elegant sheer top that I could wear all the time.
Oh my goodness, is life that easy, really?


But then, a very clever lady asked what would happen if I sat down. Mmm-hmm, yes, a very good question.
So, the fix to that would have been to tack down the i-cord all along the fabric. And I just sighed with pain and thought, man, 1) this is gonna pull on the fabric and droop it and 2) I might always be adjusting it because of the droop, etc, and 3) do I even really like it?
I scrapped it. Scratched it. Blueprint crumpled and in the garbage! And suddenly, without any effort, I had an elegant sheer top that I could wear all the time.
Oh my goodness, is life that easy, really?


This is spectacular....the colours are gorgeous and your adjustments to the original design are perfect! Looks great too :)
ReplyDeleteThanks, Anne! I am thrilled it worked out!
DeleteI think this looks terrific without the embellishments. (Though I did like your husband's design; perhaps he has a future in sweater design?) The orange is fabulous and I love the way you modified the sleeves. Great post!
ReplyDeleteIts lovely Dayana! Fabulous colour combo and looks really great on you :)
ReplyDeleteLinda O x
Love the colour and think you chose the best option - yes, even better than the original one! And you won't be wondering if there is a better one because you tried out some ideas before choosing.
ReplyDeleteI totally agree about trying something out before choosing. I have the same dilemma on my next piece. There is supposed to be embroidery, but I'm liking it without. So: I have to embroider a few just to make sure I'm right!
DeleteLovely! Is the camisole knit as part of the sweater or is it separate?
ReplyDeleteMargaret, the camisole is not part of the sweatrer... It's always such a challenge to find something to go under these sorts of things!
ReplyDelete