Weave Over Your Knitting to Great Effect - Princess Dayana Collar
.png)

My morning ritual is to wake up around 8am and check e-mail, etc. in bed for half an hour. Well, last Thursday was different, because a pattern in the new winter Knitty issue rocket-launched me out of bed, through the sleepy bedroom atmosphere to land like a meteorite into a pile of stash yarn.
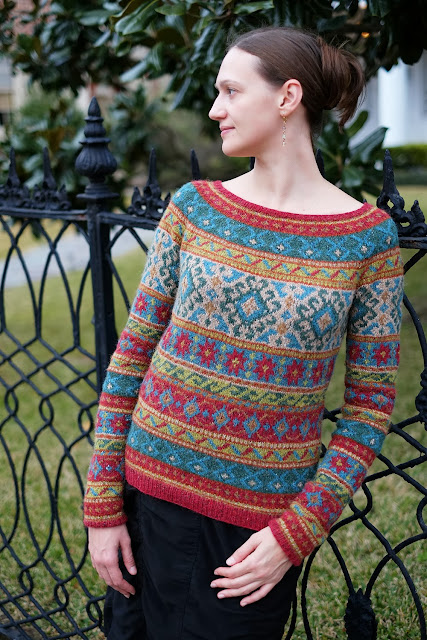
This is Princess Franklin by Franklin Habit. That amazing effect you see is from weaving yarn on top of simple garter stitch knitting.

I finally had a reason to call a project Princess Dayana. Most of you probably don't know that I pronounce my name "Diana", so this is a real coup!
I'm not sure if Princess Diana ever wore cowls, but she definitely wore plaid.


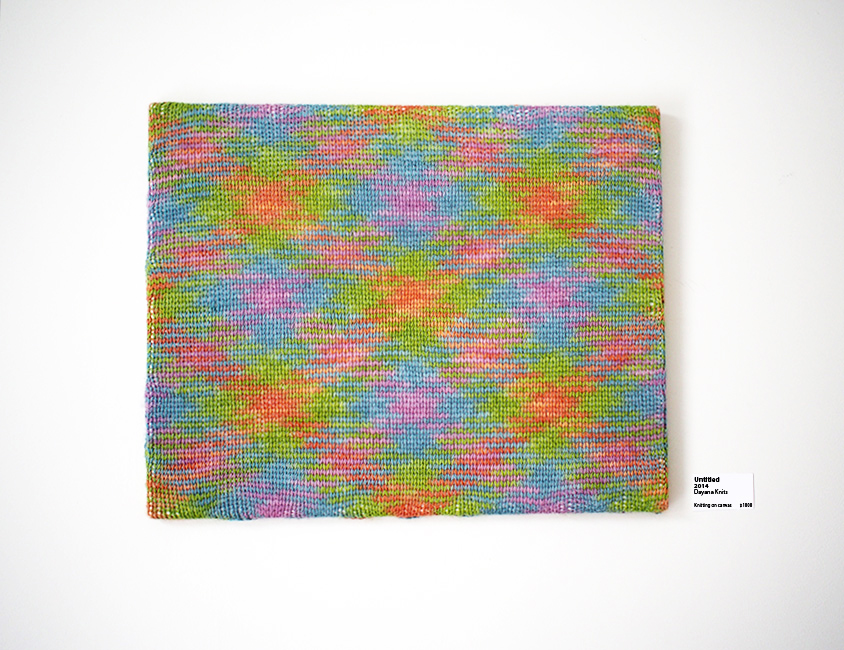
I love stashbusting. And I love how Madelinetosh Merino Light colors go together in a million ways. This project is a life saver for stash busting!
I have used bits and pieces of two of the colors (Nutmeg and Sequoia) in FIVE PROJECTS. This is a record, I am so proud!
 |
| Basile's Hair Cell sweater, blogged here |
 |
| Fuzzy Wuzzy |
 |
| Little Red Mittens |
 |
| Passo Doble, blogged here |
The pattern uses 5 colors, but the 5th one is barely used, and only while weaving. That means it has to pop and sparkle, right? Rowan Lurex Shimmer in pewter did the trick... love it!

TIP 1: GETTING STARTED. Now, if you are stash-busting, this one is important. Cast-on between 50 and 60 stitches, not 74! The cowl is going to be firm with the weaving, and 74 sts (which ends up being the height) is much longer than you want.
The original length folds up and hides all the plaid beauty and honestly, when you wear it, it's a bit like you just got treated for whiplash. :p
I didn't even bother to weave past 2/3 of the length and just folded it under instead.

This was a pretty cool modification because I didn't have to weave in the 40 or so ends from striping. I just used some of them to tack down the fold and tucked the rest inside. heh heh.
You can see how long it still is!

The folded edge is interesting, because it adds warmth, but also changes the look of the cowl if worn upside down.

Alternatively, you get a highly amusing hat.

TIP 2: INCREASE SYMMETRY. The knitted part of the collar is made by repeating a stripe sequence in garter stitch. The way the pattern is written, you will get a larger stripe of the main color (C1) at the very end. To even this out, knit *15 rows* at the end, not *19 rows*.
However, this collar is very snug, and you may need the extra width, especially after weaving. So, to have a wider cowl and still be symmetrical, simply add 2 or 4 C1 rows at the end of each main repeat, and then finish with 17 or 19 rows, respectively.

TIP 3: GRAFT CONFIDENTLY. Grafting garter stitch is really just a small tweak of regular old stockinette grafting. Start by making sure you end up with two of the same type of stitch facing you. Knit or purl, doesn't matter. I had purl stitches facing me on each needle, as seen here:

(I should say here that I didn't follow the instructions to knit 3 rows in scrap yarn after the provisional cast-on. Instead, I did a crochet provisional cast-on and started knitting with C1 right away. Following my above mod of *15 rows* at the end, I had purl stitches facing me on each needle.)
For garter grafting you will do the SAME thing on each needle. Your first pass will be the type of stitch you see. For me it was purl, so my first pass was as if to purl. The second pass is the opposite... as if to knit. Do this on the front and back needle.
I always do two stitches at once when I graft... so much faster. To do this, do the second pass, pull the stitch off the needle, but before pulling at the thread, do the first pass in the next stitch. Then pull.

Also, you should always graft loosely. It's way easier to tighten a graft then to loosen it. Ask me how I know. I once tightly grafted a ~200 stitch seam in a knit and purl pattern and suffered very greatly for it.

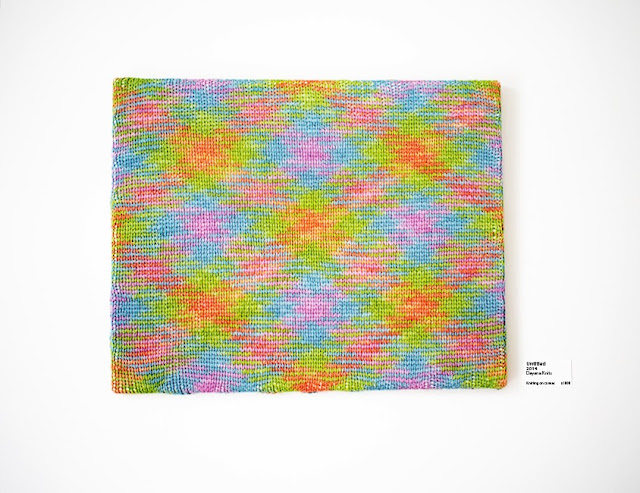
TIP 4: WEAVING WARNING. !! Be very careful when you weave, as your fabric will tighten significantly !! You will be able to slip on the cowl before weaving, but you might not be able to after.

Find a nice balance between a weave that is totally slack, and a weave that is strangle-tight. Slip the cowl over your head after every weave. Build up that hair static to a respectable 20,000 Volts!
Seriously. You'll see that it looks fabulous when it's tight, but it just won't work unless you really make a significantly wider cowl. Many of these early weaves had to be cut and re-done:

By the way, you don't have to cut a new piece for every weave. Cut longer pieces and just make a small loop or knot at the end of the row (once you pick the right tension, of course!) before moving to the next weave.
Also, if you are having trouble finding the first row to weave, mark every 10 rows with a locking stitch marker to identify where it should be. It's not too clear where to insert the needle on the edge row, so just pick some part of the stitch and be consistent the whole way through. It will look fine!

I had great fun making this cowl. The pattern is a huge hit on Ravelry, and I'm expecting to see a whole bunch of weaving-inspired knitting patterns to appear in the aftermath.
But please, Dayana, next time stay in bed. Your hands hurt from the one-week marathon!
See my Princess Dayana on Ravelry

Follow my Facebook Page to see what I am up to


You must have the patience of a saint. The end result is fantastic though.
ReplyDeleteThanks for the great pointers. I can't wait to check out my stash too!
ReplyDeleteI'm not in bed, but I'm absolutely thrilled by this amazing idea...will make a cowl soon ;-)
ReplyDelete